
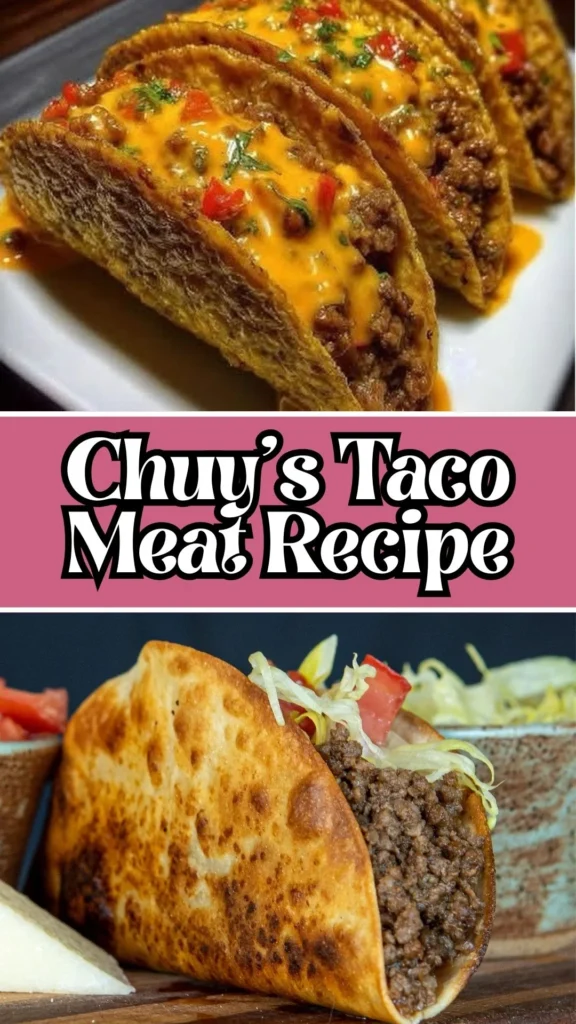
Craving that signature Tex-Mex restaurant experience without leaving your kitchen? This copycat Chuy’s taco meat recipe delivers the same bold, seasoned ground beef that made the famous chain a household name.
With perfectly spiced meat, crispy homemade taco shells, and creamy nacho cheese sauce, you’ll recreate those iconic flavors in under an hour.
Whether you’re hosting taco night or satisfying a weeknight craving, this authentic taco meat recipe brings restaurant-quality results straight to your table. Let’s dive into how to make taco meat that rivals your favorite Tex-Mex spot!
What Does It Taste Like?
This ground beef taco meat recipe delivers layers of savory, smoky, and slightly spicy flavors that define authentic Tex-Mex cuisine.
The seasoned beef combines earthy cumin, aromatic oregano, and warming chili powder with a subtle kick from cayenne pepper. Each bite offers a perfect balance of garlic-forward savoriness and gentle heat, while fresh vegetables add natural sweetness and texture.
The creamy nacho cheese sauce provides rich, tangy contrast with pickled jalapeño brightness cutting through the richness. Together with crispy corn tortillas and cool toppings, you get that crave-worthy combination of textures and temperatures that makes every taco irresistible.
Chuy’s Taco Meat Recipe Ingredients and Kitchen Utensils
For the Taco Shells
- Corn tortillas (as many as desired)
- Oil for frying (vegetable or canola oil, about 2 cups)
The Beef Filling
- 2 pounds ground beef (80/20 blend recommended)
- ½ white onion, diced
- 1 Roma tomato, diced
- ½ bell pepper, diced
- 2 teaspoons garlic salt
- 1 teaspoon onion powder
- 1 teaspoon salt
- 1 teaspoon black pepper
- 1 teaspoon ground cumin
- 1 teaspoon oregano
- 1 teaspoon chili powder
- 1 teaspoon paprika
- 1 teaspoon cayenne pepper
- 1 tablespoon cornstarch
- ¼ cup water
And The Nacho Cheese Sauce
- 3 tablespoons butter
- 1 tablespoon oil
- ¼ white onion, diced
- Small piece red bell pepper, diced (about 2 tablespoons)
- 2 tablespoons pickled jalapeños, diced
- ¼ cup pickled jalapeño juice
- 3 tablespoons all-purpose flour
- 1½ cups whole milk
- ½ teaspoon black pepper
- ½ teaspoon salt
- ½ teaspoon paprika
- 8 ounces mild cheddar cheese, shredded
Assembly and Toppings
- Shredded Mexican cheese blend
- Sour cream
- Shredded iceberg lettuce
- Restaurant-style salsa
Essential Kitchen Utensils
- Large skillet or frying pan
- Medium saucepan
- Metal tongs
- Whisk
- Wooden spoon
- Paper towels
- Small prep bowls
- Cheese grater (if shredding cheese fresh)
Preparation and Cooking Time
Prep Time: 15 minutes
Cook Time: 35 minutes
Total Time: 50 minutes
Servings: 8-10 tacos (approximately 4-5 servings)
Chuy’s Taco Meat Recipe Instructions
Step 1: Prepare the Crispy Taco Shells
Heat about 1 inch of oil in a large skillet over medium heat until it reaches 350°F. Test the temperature by dipping the edge of a corn tortilla into the oil-it should sizzle immediately. Place one tortilla flat in the hot oil and let it blister slightly for about 10-15 seconds.
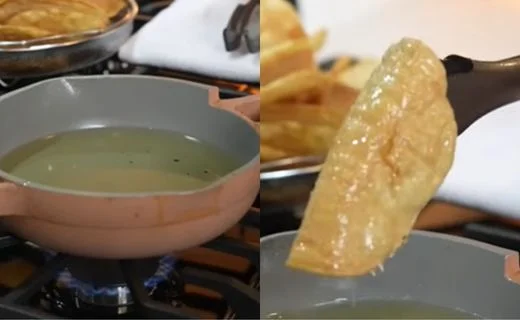
Step 2: Shape and Fry the Shells
Flip the tortilla over using tongs, then carefully fold it in half to create the classic taco shell shape. Hold it gently with tongs to maintain the U-shape while frying for 1-2 minutes per side until golden brown and crispy. Drain excess oil on paper towels and repeat with remaining tortillas. Set aside.
Step 3: Sauté the Vegetable Base
In a clean large skillet, add 1 tablespoon of oil over medium heat. Add the diced white onion, Roma tomato, and bell pepper. Sauté for about 3 minutes until the vegetables soften and become fragrant, stirring occasionally to prevent burning.
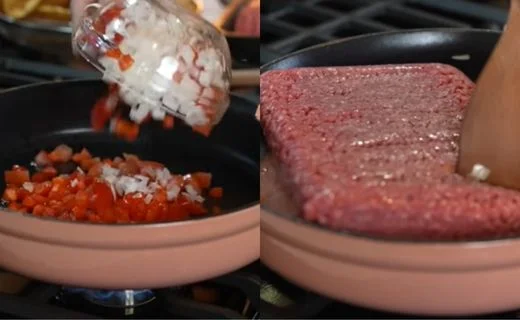
Step 4: Brown the Ground Beef
Add the 2 pounds of ground beef to the pan with the vegetables. Break up the meat with a wooden spoon into small crumbles. Cook for 7-10 minutes, stirring frequently, until the beef is completely browned with no pink remaining. Drain and discard excess fat from the pan.
Step 5: Season the Taco Meat
Return the pan to medium heat and add all the seasonings: garlic salt, onion powder, salt, black pepper, cumin, oregano, chili powder, paprika, cayenne pepper, and cornstarch. Stir thoroughly for 1-2 minutes to toast the spices and coat every piece of meat evenly. Taste and adjust salt if needed.

Step 6: Thicken the Filling
Pour in ¼ cup of water and stir well to combine. The cornstarch will create a slightly thick, cohesive mixture that clings beautifully to the meat. Let it simmer for 3-4 minutes until the sauce thickens. Cover and keep warm while you prepare the cheese sauce.
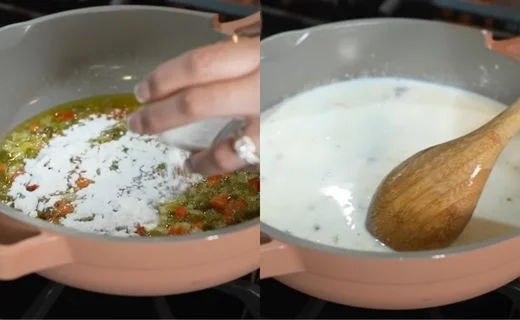
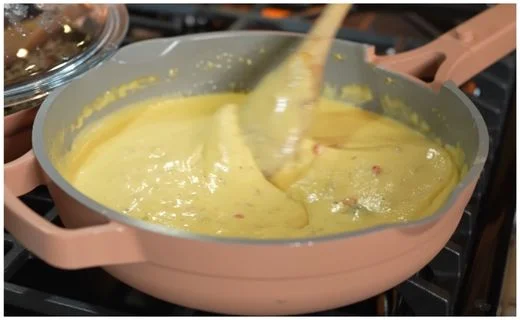
Step 7: Start the Nacho Cheese Sauce
In a medium saucepan over medium heat, melt 3 tablespoons butter with 1 tablespoon oil. Add the diced onion, red bell pepper, and pickled jalapeños. Sauté for 3 minutes until softened and aromatic, stirring occasionally.
Step 8: Create the Cheese Roux
Sprinkle 3 tablespoons of flour over the vegetable mixture and stir constantly for 1-2 minutes to create a roux. This step eliminates the raw flour taste and creates the base for a smooth, creamy sauce.
Step 9: Build the Cheese Sauce
Gradually whisk in the milk, pouring slowly while stirring continuously to prevent lumps. Add the pickled jalapeño juice, black pepper, salt, and paprika. Continue whisking and cooking for 4-5 minutes until the sauce noticeably thickens and coats the back of a spoon.
Step 10: Melt the Cheese
Reduce heat to low and add the shredded cheddar cheese in three batches, stirring until completely melted and smooth between each addition. Once all cheese is incorporated and the sauce is velvety, remove from heat.
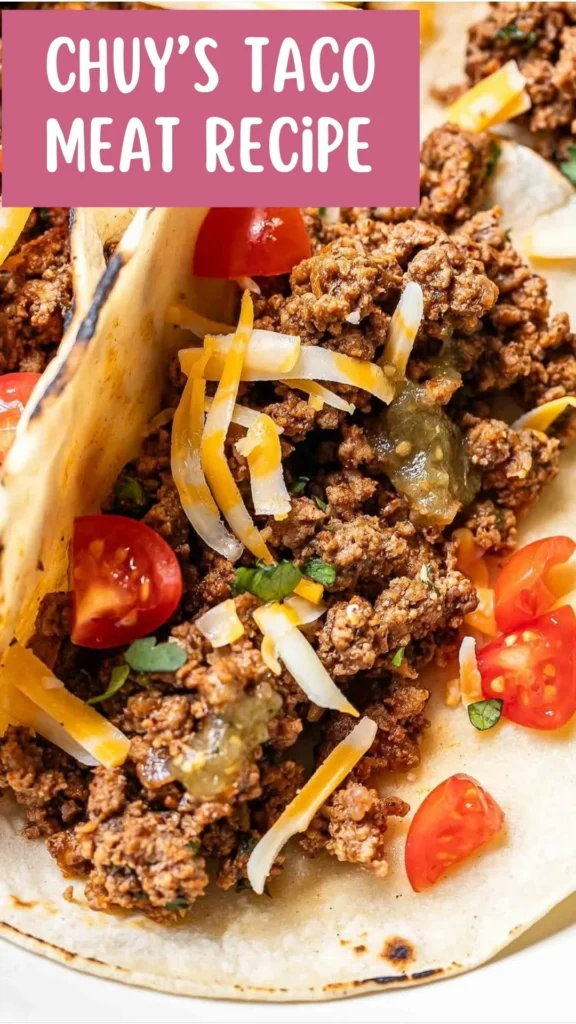
Step 11: Assemble Your Tacos
Take a crispy taco shell and spoon 1-2 tablespoons of warm nacho cheese sauce into the bottom. Add a generous portion of the seasoned beef filling (about ¼ to ⅓ cup). Top with shredded cheese, a dollop of sour cream, shredded lettuce, and your favorite restaurant-style salsa.

Step 12: Serve and Enjoy
Arrange the assembled tacos on a platter and serve immediately while the shells are crispy and the filling is hot. Set out extra toppings so everyone can customize their perfect taco!
Customization and Pairing for Serving Ideas
1. Protein Variations
Transform this best taco meat recipe by swapping ground beef for ground turkey, chicken, or even plant-based crumbles for a lighter option. For authentic carnitas-style tacos, use shredded pork shoulder seasoned with the same spice blend. Ground lamb creates an interesting Middle Eastern-Tex-Mex fusion that’s surprisingly delicious.
2. Spice Level Adjustments
Dial up the heat by adding diced fresh jalapeños to the meat mixture or doubling the cayenne pepper. For a milder family-friendly version, reduce or omit the cayenne entirely and use mild salsa. You can also incorporate chipotle peppers in adobo sauce for smoky depth without overwhelming spiciness.
3. Cheese Sauce Variations
Elevate your nacho cheese by blending in pepper jack cheese for extra kick, or add a spoonful of cream cheese for extra creaminess. Mix in roasted green chiles or sun-dried tomatoes for gourmet flavor. For a white queso version, substitute white American cheese and Monterey Jack.
4. Cheesy Party Platter
Turn your Chuy’s Taco Meat Recipe into a cheesy party platter by spooning the seasoned beef over chips, adding creamy chuy’s tex mex queso, fresh jalapeños and tomatoes for sharing.
5. Shell Alternatives
Skip frying and use store-bought hard taco shells, soft flour tortillas warmed on the griddle, or crispy tostadas for an open-faced presentation. Lettuce wraps offer a low-carb option, while naan bread creates a fun fusion taco experience.
6. Smoky Tortilla Feast
Serve your Chuy’s Taco Meat Recipe inside warm tortillas, layering rice, beans and roasted chuy’s hatch green chile for smoky heat, creating a hearty Tex-Mex dinner everyone enjoys tonight together.
7. Side Dish Pairings
Serve alongside classic Mexican rice cooked with tomato sauce and chicken broth, or creamy refried beans topped with queso fresco. Elote (Mexican street corn), fresh guacamole with tortilla chips, black bean salad, or cilantro-lime rice complement the rich taco flavors beautifully.
8. Hearty Burrito Bowl
Build a filling bowl around your Chuy’s Taco Meat Recipe with cilantro rice, grilled peppers and a sliced chuy’s beef burrito on the side for a satisfying restaurant-style meal tonight.
9. Topping Bar Ideas
Create an interactive taco bar with pickled red onions, fresh pico de gallo, sliced radishes, crumbled cotija cheese, chopped cilantro, lime wedges, sliced avocado, hot sauce varieties, and Mexican crema. This allows guests to build their perfect customized taco.
10. Complete Meal Combinations
Pair these tacos with refreshing agua fresca (watermelon or horchata), Mexican beer with lime, or classic margaritas. For dessert, serve churros with chocolate sauce or tres leches cake to complete your authentic Tex-Mex feast at home.
Expert Tips for Perfect Taco Meat
1. Choose the Right Ground Beef
For the juiciest, most flavorful taco meat, select 80/20 ground beef (80% lean, 20% fat). This fat ratio ensures your ground beef taco meat stays moist and tender rather than dry and crumbly. Leaner beef like 90/10 works but may need a splash of beef broth to maintain moisture. Always brown meat over medium-high heat for better caramelization.
2. Master the Taco Shell Frying Technique
The secret to perfectly crispy homemade taco shells is oil temperature-maintain it between 350-365°F. Too cool and shells absorb excess oil becoming greasy; too hot and they burn before crisping. Fry only 1-2 tortillas at a time to maintain consistent temperature. Use fresh corn tortillas at room temperature, as cold tortillas crack when folded.
3. Toast Your Spices for Maximum Flavor
Before adding water, let the seasoned meat cook undisturbed for 30-60 seconds after mixing in spices. This “blooming” technique activates essential oils in cumin, chili powder, and oregano, intensifying their flavors exponentially. The aromatics released during this step are what separate good taco meat from extraordinary taco meat.
4. Don’t Skip the Cornstarch Thickener
The tablespoon of cornstarch mixed into your seasonings isn’t optional-it creates that signature restaurant-style coating that clings to each meat crumble rather than pooling at the bottom of your taco. Mix it thoroughly with dry spices before adding liquid to prevent clumping and ensure even distribution.
5. Control Your Cheese Sauce Consistency
Add milk gradually while whisking constantly to achieve silky-smooth nacho cheese without lumps. If your sauce becomes too thick, thin it with additional milk one tablespoon at a time. If it’s too thin, let it simmer longer or whisk in a slurry of 1 teaspoon cornstarch mixed with 1 tablespoon cold milk. Always melt cheese on low heat to prevent separation.
6. Drain Fat Strategically
After browning ground beef, tilt your pan and use a spoon to remove excess fat, but leave about 1-2 tablespoons in the pan. This small amount of fat carries flavor and helps spices distribute evenly throughout the meat. Removing all fat can result in dry, less flavorful taco filling.
7. Timing and Temperature Management
Prepare components in order: shells first (they stay crispy longer than you’d think), then meat (keeps well covered), then cheese sauce last (serve immediately for best texture). Keep finished taco meat covered on low heat and stir occasionally to prevent drying. If cheese sauce thickens while waiting, whisk in warm milk to restore consistency.
Storage and Reheating Guidance
Store leftover taco meat in an airtight container in the refrigerator for up to 4 days or freeze for up to 3 months. Refrigerate nacho cheese sauce separately for 3-4 days. Reheat meat in a skillet over medium heat with a splash of water, or microwave in 30-second intervals. Warm cheese sauce gently on the stovetop, whisking in milk to restore creaminess. Store taco shells at room temperature in a sealed bag for 2-3 days.
Common Queries and FAQs
Common Chuy’s Taco Meat Recipe questions answered to help you understand it better.
What makes Chuy’s taco meat different from regular taco meat?
Chuy’s taco meat stands out due to its unique combination of fresh diced vegetables (onion, tomato, and bell pepper) cooked directly with the ground beef, creating natural sweetness and texture. The signature spice blend featuring eight different seasonings plus the cornstarch thickener creates that distinctive restaurant-quality coating. Most homemade taco recipes use fewer spices and skip the vegetable base, resulting in less complex flavor.
Can I make this ground beef taco meat recipe ahead of time?
Absolutely! This is actually one of the best make-ahead taco recipes. Prepare the seasoned beef filling up to 2 days in advance and store it in an airtight container in the refrigerator. The flavors actually deepen and meld beautifully overnight. When ready to serve, reheat gently in a skillet over medium-low heat, adding 2-3 tablespoons of water to restore moisture. The nacho cheese sauce can also be made a day ahead and reheated with additional milk.
How do I prevent my homemade taco shells from getting soggy?
Keep taco shells crispy by ensuring they’re completely drained on paper towels after frying and stored in an uncovered container at room temperature. Never refrigerate fried taco shells as moisture causes sogginess. Assemble tacos immediately before serving, and place the nacho cheese sauce in first as a moisture barrier before adding the hot meat. This creates a protective layer between the shell and wet ingredients.
What’s the best ground beef to use for authentic taco meat?
For the most authentic texture and flavor, use 80/20 ground beef (80% lean, 20% fat). This ratio provides enough fat to keep the meat juicy and flavorful without being greasy. Ground chuck is ideal for tacos. Avoid extra-lean beef (90/10 or higher) as it tends to dry out during cooking. If you must use leaner beef, add 2-3 tablespoons of beef broth or water while simmering to compensate for reduced fat content.
Can I substitute ground turkey or chicken in this recipe?
Yes, you can substitute ground turkey or chicken using the exact same cooking method and seasonings. Since these proteins are leaner than beef, add 2 tablespoons of olive oil when browning to prevent dryness. Ground turkey works particularly well and absorbs the Tex-Mex spices beautifully. You may need to increase salt slightly as poultry has milder natural flavor than beef. The cooking time remains the same.
Why does my nacho cheese sauce turn grainy or separate?
Cheese sauce becomes grainy when cheese is added to liquid that’s too hot or when it’s cooked at too high a temperature. Always reduce heat to low before adding shredded cheese, and add it gradually in small batches while stirring constantly. Pre-shredded cheese contains anti-caking agents that can affect texture-freshly grated cheese from a block melts more smoothly. Never let cheese sauce boil after adding cheese, as this causes protein separation.
How can I make this recipe spicier or milder?
To increase heat, double the cayenne pepper, add 1-2 diced fresh jalapeños with the vegetables, or incorporate 1 tablespoon of your favorite hot sauce into the meat. For a fiery nacho cheese, add diced habaneros or ghost pepper flakes. To make it milder and family-friendly, reduce cayenne to ¼ teaspoon or omit it entirely, use mild chili powder, and skip the jalapeños in the cheese sauce. The cumin and paprika still provide plenty of flavor without heat.
What can I use instead of pickled jalapeño juice in the cheese sauce?
If you don’t have pickled jalapeño juice, substitute with 3 tablespoons apple cider vinegar mixed with 1 tablespoon water and a pinch of salt, or use pickle juice from dill pickles. White wine vinegar or fresh lime juice also work. The acid is essential for both flavor balance and helping the cheese melt smoothly. In a pinch, omit it but add an extra ¼ teaspoon of salt and 2 tablespoons additional milk.
How do I keep taco meat from being too greasy?
After browning ground beef, tilt the pan and use a large spoon to carefully remove most (but not all) of the rendered fat, leaving about 1-2 tablespoons for flavor. You can also use a turkey baster to extract excess grease. Starting with 80/20 ground beef rather than higher-fat ratios (like 73/27) helps. Alternatively, brown meat in a separate pan, drain thoroughly in a colander, then transfer to a clean pan before adding vegetables and seasonings.
Can I freeze leftover taco meat and cheese sauce?
The seasoned ground beef taco meat freezes excellently for up to 3 months. Cool completely, portion into freezer-safe containers or bags, and label with the date. Thaw overnight in the refrigerator and reheat with a splash of water. However, nacho cheese sauce doesn’t freeze well-dairy-based sauces often separate and become grainy when thawed. It’s best to make cheese sauce fresh or store it refrigerated for only 3-4 days maximum.
What sides go best with these Tex-Mex tacos?
Authentic Tex-Mex pairings include Mexican rice (cooked with tomato sauce and spices), refried beans topped with cheese, street corn (elote) with mayo and cotija, fresh guacamole, pico de gallo, black bean and corn salad, cilantro-lime rice, or crispy tortilla chips with queso. For lighter options, serve a simple cabbage slaw with lime vinaigrette or a refreshing jicama and cucumber salad.
How many tacos does 2 pounds of ground beef make?
Two pounds of ground beef typically makes 8-10 generously filled tacos, serving approximately 4-5 people (assuming 2 tacos per person). The exact yield depends on how much meat you use per taco and the size of your taco shells. For larger gatherings, this recipe scales beautifully-just maintain the same spice ratios proportionally.
Do I need to use fresh or dried oregano for taco meat?
Always use dried oregano (preferably Mexican oregano if available) in this taco seasoning blend, not fresh. Dried herbs are more concentrated and provide the authentic flavor profile expected in Tex-Mex cuisine. Fresh oregano contains too much moisture and has a different flavor intensity that won’t blend properly with the other dried spices. One teaspoon of dried oregano equals approximately one tablespoon of fresh.
What’s the purpose of cornstarch in the taco meat?
Cornstarch serves as a thickening agent that creates a cohesive, restaurant-style taco filling. When mixed with water and added to the seasoned meat, it forms a light coating that helps seasonings cling to each piece of ground beef rather than settling at the bottom of the pan. This results in more flavorful, evenly seasoned meat with better texture. It also prevents tacos from becoming soggy by reducing excess liquid.
Chuy's Taco Meat Recipe

Craving that signature Tex-Mex restaurant experience without leaving your kitchen? This copycat Chuy’s taco meat recipe delivers the same bold, seasoned ground beef that made the famous chain a household name. With perfectly spiced meat, crispy homemade taco shells, and creamy nacho cheese sauce, you’ll recreate those iconic flavors in under an hour.
Ingredients
- Corn tortillas (as many as desired)
- Oil for frying (vegetable or canola oil, about 2 cups)
- 2 pounds ground beef (80/20 blend recommended)
- ½ white onion, diced
- 1 Roma tomato, diced
- ½ bell pepper, diced
- 2 teaspoons garlic salt
- 1 teaspoon onion powder
- 1 teaspoon salt
- 1 teaspoon black pepper
- 1 teaspoon ground cumin
- 1 teaspoon oregano
- 1 teaspoon chili powder
- 1 teaspoon paprika
- 1 teaspoon cayenne pepper
- 1 tablespoon cornstarch
- ¼ cup water
- 3 tablespoons butter
- 1 tablespoon oil
- ¼ white onion, diced
- Small piece red bell pepper, diced (about 2 tablespoons)
- 2 tablespoons pickled jalapeños, diced
- ¼ cup pickled jalapeño juice
- 3 tablespoons all-purpose flour
- 1½ cups whole milk
- ½ teaspoon black pepper
- ½ teaspoon salt
- ½ teaspoon paprika
- 8 ounces mild cheddar cheese, shredded
- Shredded Mexican cheese blend
- Sour cream
- Shredded iceberg lettuce
- Restaurant-style salsa
Instructions
Step 1: Prepare the Crispy Taco Shells
Heat about 1 inch of oil in a large skillet over medium heat until it reaches 350°F. Test the temperature by dipping the edge of a corn tortilla into the oil-it should sizzle immediately. Place one tortilla flat in the hot oil and let it blister slightly for about 10-15 seconds.
Step 2: Shape and Fry the Shells
Flip the tortilla over using tongs, then carefully fold it in half to create the classic taco shell shape. Hold it gently with tongs to maintain the U-shape while frying for 1-2 minutes per side until golden brown and crispy. Drain excess oil on paper towels and repeat with remaining tortillas. Set aside.
Step 3: Sauté the Vegetable Base
In a clean large skillet, add 1 tablespoon of oil over medium heat. Add the diced white onion, Roma tomato, and bell pepper. Sauté for about 3 minutes until the vegetables soften and become fragrant, stirring occasionally to prevent burning.
Step 4: Brown the Ground Beef
Add the 2 pounds of ground beef to the pan with the vegetables. Break up the meat with a wooden spoon into small crumbles. Cook for 7-10 minutes, stirring frequently, until the beef is completely browned with no pink remaining. Drain and discard excess fat from the pan.
Step 5: Season the Taco Meat
Return the pan to medium heat and add all the seasonings: garlic salt, onion powder, salt, black pepper, cumin, oregano, chili powder, paprika, cayenne pepper, and cornstarch. Stir thoroughly for 1-2 minutes to toast the spices and coat every piece of meat evenly. Taste and adjust salt if needed.
Step 6: Thicken the Filling
Pour in ¼ cup of water and stir well to combine. The cornstarch will create a slightly thick, cohesive mixture that clings beautifully to the meat. Let it simmer for 3-4 minutes until the sauce thickens. Cover and keep warm while you prepare the cheese sauce.
Step 7: Start the Nacho Cheese Sauce
In a medium saucepan over medium heat, melt 3 tablespoons butter with 1 tablespoon oil. Add the diced onion, red bell pepper, and pickled jalapeños. Sauté for 3 minutes until softened and aromatic, stirring occasionally.
Step 8: Create the Cheese Roux
Sprinkle 3 tablespoons of flour over the vegetable mixture and stir constantly for 1-2 minutes to create a roux. This step eliminates the raw flour taste and creates the base for a smooth, creamy sauce.
Step 9: Build the Cheese Sauce
Gradually whisk in the milk, pouring slowly while stirring continuously to prevent lumps. Add the pickled jalapeño juice, black pepper, salt, and paprika. Continue whisking and cooking for 4-5 minutes until the sauce noticeably thickens and coats the back of a spoon.
Step 10: Melt the Cheese
Reduce heat to low and add the shredded cheddar cheese in three batches, stirring until completely melted and smooth between each addition. Once all cheese is incorporated and the sauce is velvety, remove from heat.
Step 11: Assemble Your Tacos
Take a crispy taco shell and spoon 1-2 tablespoons of warm nacho cheese sauce into the bottom. Add a generous portion of the seasoned beef filling (about ¼ to ⅓ cup). Top with shredded cheese, a dollop of sour cream, shredded lettuce, and your favorite restaurant-style salsa.
Step 12: Serve and Enjoy
Arrange the assembled tacos on a platter and serve immediately while the shells are crispy and the filling is hot. Set out extra toppings so everyone can customize their perfect taco!
Notes
Store leftover taco meat in an airtight container in the refrigerator for up to 4 days or freeze for up to 3 months. Refrigerate nacho cheese sauce separately for 3-4 days. Reheat meat in a skillet over medium heat with a splash of water, or microwave in 30-second intervals. Warm cheese sauce gently on the stovetop, whisking in milk to restore creaminess. Store taco shells at room temperature in a sealed bag for 2-3 days.
Nutrition Information:
Yield:
6Serving Size:
1Amount Per Serving: Calories: 210
This copycat Chuy’s taco meat recipe brings authentic Tex-Mex restaurant flavors right to your home kitchen with simple ingredients and straightforward techniques. From the perfectly seasoned ground beef to the creamy nacho cheese sauce and crispy homemade shells, every element works together to create an unforgettable taco experience.
Whether you’re feeding a crowd at taco night or satisfying a weeknight craving, this best taco meat recipe delivers consistent, delicious results every time. Now that you know how to make taco meat like the pros, gather your ingredients and start cooking-your taste buds will thank you!
You can also follow us on Pinterest, and YouTube for more delicious updates and kitchen inspiration. Your feedback and support mean the world to us!