
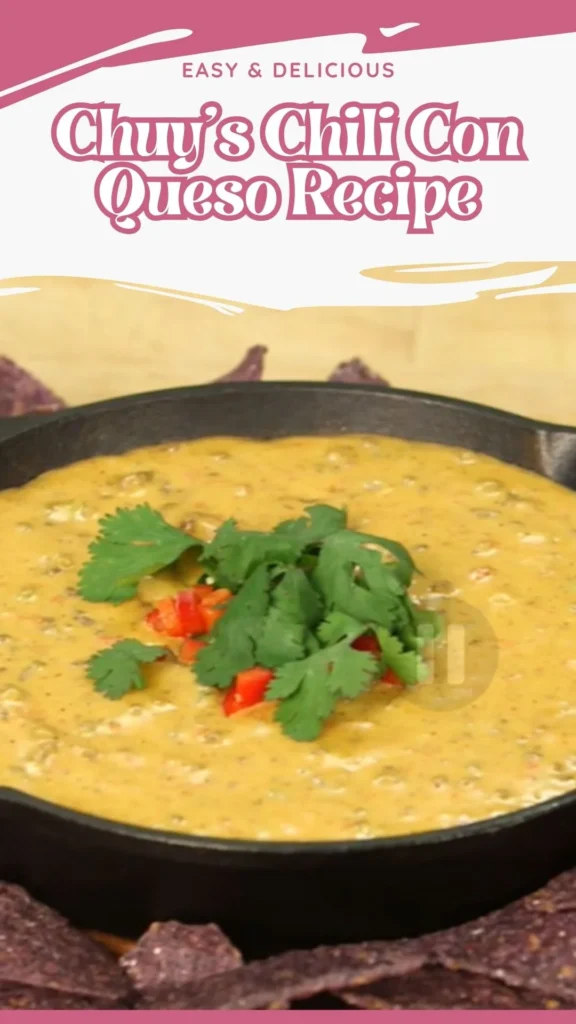
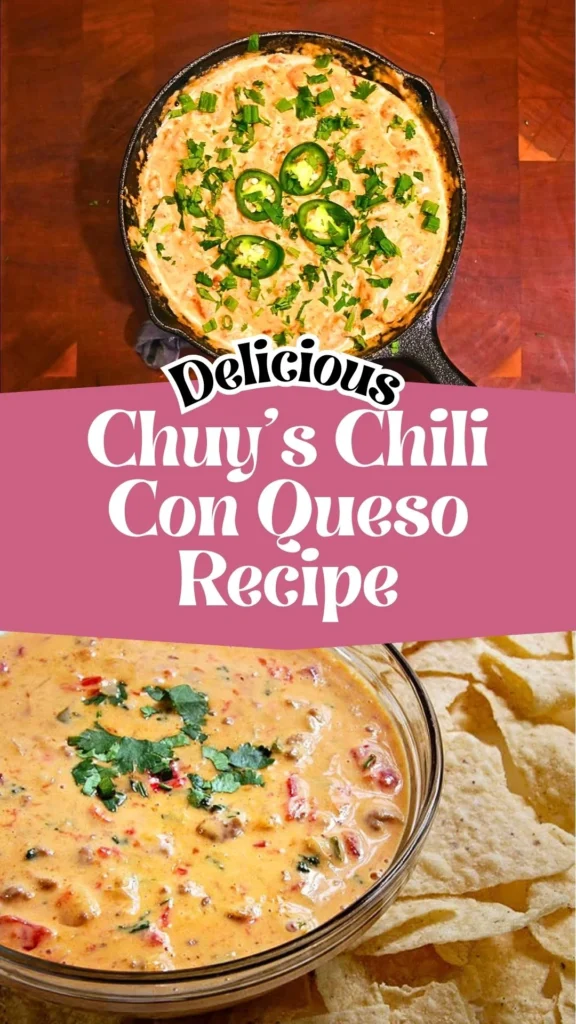
There’s something magical about Chuy’s famous chili con queso-that irresistibly creamy, beefy, spicy cheese dip that keeps you reaching for just one more chip. If you’ve been craving that Tex-Mex restaurant experience at home, you’re in luck!
This copycat Chuy’s chili con queso recipe captures all the bold, comforting flavors of the original. Whether you’re hosting game day, planning a fiesta, or simply indulging a cheesy craving, this authentic chili con queso recipe easy enough for any home cook delivers restaurant-quality results every single time.
Pair it with chuy’s shrimp tacos, elvis chicken, and warm flour tortilla for a flavorful, crowd-pleasing Tex-Mex experience at home. Get ready to impress your guests with this crowd-pleasing appetizer that’s become a Tex-Mex legend.
What Does It Taste Like?
This Chuy’s chili con queso recipe with ground beef offers an incredible flavor experience that hits all the right notes. The first taste delivers rich, melted cheese with a velvety smoothness that coats your palate.
Savory, well-seasoned ground beef adds hearty substance and umami depth, while diced tomatoes provide bright acidity that cuts through the richness. Fresh jalapeños and a carefully balanced spice blend bring gentle heat that builds gradually-warm and inviting rather than overwhelming.
The combination of cumin, paprika, and cayenne creates layers of Tex-Mex flavor complexity, with aromatic onions and garlic adding a savory foundation that makes this queso utterly addictive.
Chuy’s Chili Con Queso Ingredients You’ll Need
For the Chili Con Queso:
- 2 tablespoons vegetable oil (for sautéing)
- 1½ cups yellow onion, finely diced
- 2 medium jalapeños, seeded and diced
- 1 teaspoon salt
- ½ teaspoon black pepper
- 1 teaspoon garlic powder
- 1 teaspoon onion powder
- ½ teaspoon cayenne pepper
- 1½ teaspoons ground cumin
- 1 teaspoon paprika
- 1 pound ground beef (15% fat)
- 1½ cups diced tomatoes (fresh or canned, drained)
- 1½ pounds processed cheese (Velveeta or easy-melt cheese), cubed
Garnish:
- Fresh jalapeño slices
- Fresno chilis, thinly sliced
- Green onions, chopped
- Fresh cilantro sprigs
Serving:
- Blue tortilla chips (or traditional yellow corn chips)
- Celery sticks (optional)
- Carrot sticks (optional)
Kitchen Utensils Required
- Large sauté pan or deep skillet
- Wooden spoon or spatula
- Sharp knife and cutting board
- Measuring spoons
- Heat-safe serving bowl or cast iron skillet
- Cheese grater (if using block cheese)
Preparation and Cooking Time
- Prep Time: 15 minutes
- Cook Time: 20 minutes
- Total Time: 35 minutes
- Servings: 8-10 servings (approximately 6 cups)
Step-by-Step Chuy’s Chili Con Queso Recipe Instructions
Step 1: Sauté the Aromatics
Heat 2 tablespoons of vegetable oil in a large sauté pan over medium heat. Add the diced onions and jalapeños.
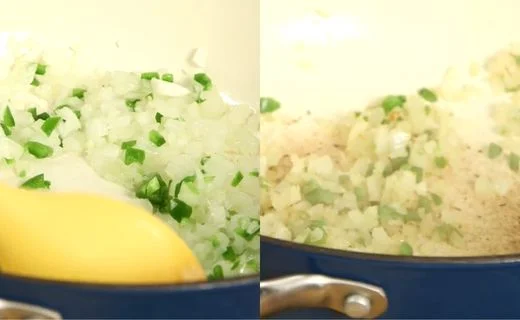
Cook for 4-5 minutes, stirring occasionally, until they soften and begin to sweat, releasing their aromatic oils.
Step 2: Season the Vegetables
Add salt, black pepper, garlic powder, onion powder, cayenne pepper, cumin, and paprika to the softened vegetables.
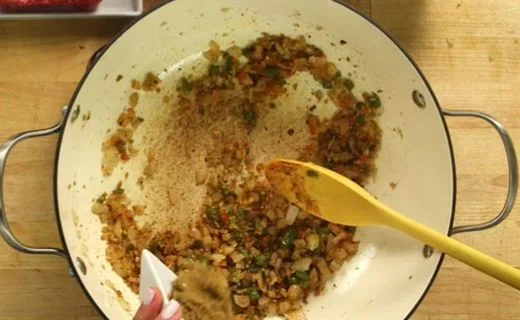
Stir well to coat everything evenly with the spice blend, allowing the spices to bloom for about 30 seconds.
Step 3: Brown the Ground Beef
Add the 1 pound of ground beef to the pan. Break it up with your wooden spoon or spatula, mixing it thoroughly with the seasoned vegetables.

Continue cooking for 6-8 minutes, stirring frequently, until the beef is completely browned with no pink remaining.
Step 4: Add Tomatoes
Stir in the diced tomatoes and mix well with the beef mixture.
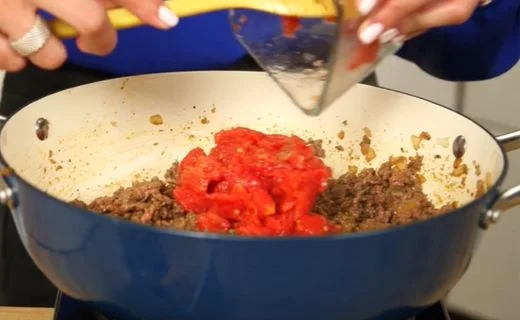
Let this cook together for 2-3 minutes, allowing the flavors to meld and the tomatoes to warm through.
Step 5: Melt the Cheese
Add the cubed processed cheese to the pan. Reduce heat to medium-low.
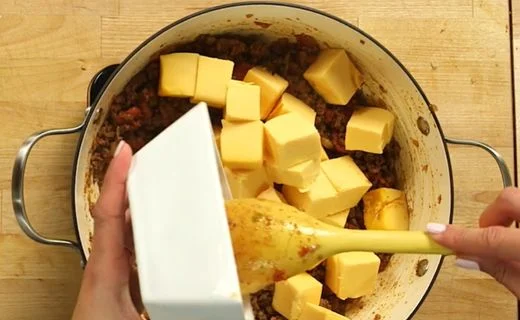
Stir occasionally and patiently allow the cheese to melt completely, about 5-7 minutes, until the mixture becomes smooth, creamy, and fully incorporated.
Step 6: Serve and Garnish
Pour the finished queso into a heat-safe serving bowl or cast iron skillet (which helps retain heat).
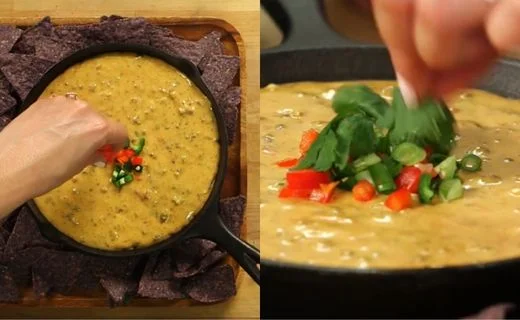
Garnish generously with fresh jalapeño slices, Fresno chilis, chopped green onions, and cilantro sprigs. Serve immediately with blue tortilla chips, celery sticks, and carrot sticks on the side.
Customization and Pairing Ideas for Serving
1. White Queso Variation
Transform this into a Chuy’s chili con queso recipe without velveeta by using white American cheese combined with Monterey Jack and cream cheese for a more upscale, smooth texture with less processed ingredients.
2. Vegetarian Chili Con Queso
Replace the ground beef with black beans, pinto beans, or a plant-based meat alternative. Add extra vegetables like bell peppers, corn, and zucchini for a hearty vegetarian version that doesn’t sacrifice flavor.
3. Chorizo Upgrade
Swap half or all of the ground beef with Mexican chorizo for an authentic, spicier flavor profile that adds smoky, paprika-rich notes to your queso dip.
4. Loaded Nacho Bar
Use this queso as the star of a nacho bar setup. Serve alongside shredded lettuce, sour cream, guacamole, black beans, pickled jalapeños, and pico de gallo for build-your-own loaded nachos.
5. Breakfast Queso Bowl
Serve this chili con queso over scrambled eggs or breakfast potatoes for an indulgent Tex-Mex breakfast that transforms your morning routine.
6. Queso Fundido Style
Transfer the finished queso to an oven-safe skillet, top with additional shredded cheese and crumbled chorizo, then broil for 2-3 minutes until bubbly and golden on top.
7. Taco Tuesday Topping
This versatile queso works beautifully as a topping for tacos, burritos, quesadillas, or burrito bowls. Drizzle it over your favorite Tex-Mex dishes to elevate any meal with restaurant-style presentation and flavor.
Essential Tips for Perfect Chili Con Queso
1. Choose the Right Beef Fat Content
Using ground beef with 15% fat (85/15) is crucial for the best flavor and texture. Leaner beef becomes dry and lacks richness, while fattier options make the queso too greasy. If using 80/20, drain some excess fat after browning.
2. Dice Vegetables Uniformly
Cut your onions, jalapeños, and tomatoes into small, uniform pieces (about ¼-inch). This ensures even cooking, consistent texture in every bite, and prevents large chunks from overwhelming the creamy cheese base.
3. Control the Heat Level
Adjust spiciness to your preference by controlling the jalapeños. Remove all seeds and membranes for mild heat, leave half the seeds for medium spice, or use serrano peppers instead for extra kick. Always taste and adjust before serving.
4. Temperature Management is Key
Once you add the cheese, reduce heat to medium-low or low. High heat can cause cheese to break, becoming grainy or oily instead of smooth and creamy. Patience during melting creates that signature silky texture.
5. Prevent Cheese from Separating
If your queso begins to look oily or separated, whisk in a tablespoon of milk or cream to bring it back together. Stirring constantly while cheese melts also prevents separation and ensures even consistency throughout.
6. Customize Your Cheese Blend
While processed cheese creates authentic Chuy’s-style queso, you can experiment with a combination of white American cheese, sharp cheddar, and Monterey Jack for more complex flavor. Add a bit of cream cheese for extra creaminess.
7. Serve at the Right Temperature
Queso is best served warm and maintains its creamy consistency when kept between 140-160°F. Use a slow cooker, fondue pot, or cast iron skillet over a warming tray to keep your dip at the perfect temperature throughout your gathering.

Storage and Reheating Guidance
Store leftover chili con queso in an airtight container in the refrigerator for up to 4 days. Reheat gently on the stovetop over low heat, stirring frequently and adding 2-3 tablespoons of milk to restore creaminess. Microwave in 30-second intervals, stirring between each, until heated through and smooth.
Common Queries and FAQs
Discover answers to the most common Chuy’s Chili Con Queso Recipe questions people ask.
Can I make Chuy’s chili con queso ahead of time?
Yes! You can prepare this queso up to 2 days in advance. Store it in the refrigerator and reheat gently before serving. The flavors actually deepen and meld beautifully when made ahead. Just add a splash of milk while reheating to restore the creamy consistency.
What’s the best cheese for authentic chili con queso?
Processed cheese like Velveeta creates the smoothest, most authentic Tex-Mex restaurant-style queso that doesn’t separate or become grainy. For a less processed option, combine white American cheese with Monterey Jack and a bit of cream cheese for excellent melting properties.
Why is my queso grainy or separated?
Grainy queso typically results from overheating. Cheese proteins tighten when exposed to high heat, causing separation. Always melt cheese over low to medium-low heat, stir constantly, and remove from heat as soon as it’s melted. Adding a small amount of cornstarch to the cheese before melting can also help stabilize it.
Can I freeze chili con queso?
While technically possible, freezing isn’t recommended for cheese-based dips as they often separate and become grainy when thawed. If you must freeze it, store in an airtight container for up to 2 months, then reheat very slowly while whisking vigorously and adding milk to reconstitute the texture.
How do I make this queso spicier?
Increase heat by leaving jalapeño seeds in, adding diced serrano peppers, increasing cayenne pepper to 1 teaspoon, or stirring in hot sauce like Cholula or Tabasco. For smoky heat, add chipotle peppers in adobo sauce or a dash of chipotle powder.
What can I serve with chili con queso besides chips?
This versatile dip pairs wonderfully with tortilla chips, fresh vegetables (celery, carrots, bell peppers), warm soft pretzels, toasted baguette slices, breadsticks, quesadilla triangles, or even as a topping for baked potatoes, french fries, or nachos.
Is there a dairy-free version of this recipe?
Absolutely! Use dairy-free processed cheese alternatives (like vegan Velveeta-style products), nutritional yeast for cheesy flavor, or make a cashew-based cheese sauce. Combine with the same beef and seasonings for a dairy-free option that’s still creamy and delicious.
How long does queso stay good at room temperature?
For food safety, don’t leave queso at room temperature for more than 2 hours. Use a slow cooker on the “warm” setting, a fondue pot, or a warming tray to keep it safely heated during parties. Discard any queso that’s been sitting out longer than 2 hours.
Can I use fresh tomatoes instead of canned?
Yes! Fresh tomatoes work beautifully-just dice them small and remove excess seeds and juice to prevent the queso from becoming too watery. Roma tomatoes are ideal because they’re meatier with less moisture. You’ll need about 2-3 medium tomatoes.
What’s the difference between queso and chili con queso?
Regular queso is simply melted cheese dip, often just cheese with peppers. Chili con queso (literally “cheese with chili”) includes seasoned ground beef or chili, making it heartier, more substantial, and protein-rich-essentially a meal-in-a-dip rather than just an appetizer.
How do I keep queso warm during a party?
Transfer your queso to a slow cooker set on “warm” or low, use a fondue pot with a tea light, or serve in a cast iron skillet on a warming tray. Stir occasionally and add splashes of milk if it thickens. These methods keep queso at the perfect serving temperature for hours.
Can I make this in a slow cooker?
Yes! Brown the beef and sauté vegetables on the stovetop first, then transfer everything to a slow cooker with the cheese. Cook on low for 1-2 hours, stirring occasionally until smooth. This method is perfect for parties as it keeps the queso warm and ready to serve.
Chuy's Chili Con Queso Recipe

There’s something magical about Chuy’s famous chili con queso-that irresistibly creamy, beefy, spicy cheese dip that keeps you reaching for just one more chip. If you’ve been craving that Tex-Mex restaurant experience at home, you’re in luck! This copycat Chuy’s chili con queso recipe captures all the bold, comforting flavors of the original.
Ingredients
- 2 tablespoons vegetable oil
- 1½ cups yellow onion, finely diced
- 2 medium jalapeños, seeded and diced
- 1 teaspoon salt
- ½ teaspoon black pepper
- 1 teaspoon garlic powder
- 1 teaspoon onion powder
- ½ teaspoon cayenne pepper
- 1½ teaspoons ground cumin
- 1 teaspoon paprika
- 1 pound ground beef
- 1½ cups diced tomatoes
- 1½ pounds processed cheese (Velveeta or easy-melt cheese), cubed
- Fresh jalapeño slices
- Fresno chilis, thinly sliced
- Green onions, chopped
- Fresh cilantro sprigs
Instructions
Step 1: Sauté the Aromatics
Heat 2 tablespoons of vegetable oil in a large sauté pan over medium heat. Add the diced onions and jalapeños. Cook for 4-5 minutes, stirring occasionally, until they soften and begin to sweat, releasing their aromatic oils.
Step 2: Season the Vegetables
Add salt, black pepper, garlic powder, onion powder, cayenne pepper, cumin, and paprika to the softened vegetables. Stir well to coat everything evenly with the spice blend, allowing the spices to bloom for about 30 seconds.
Step 3: Brown the Ground Beef
Add the 1 pound of ground beef to the pan. Break it up with your wooden spoon or spatula, mixing it thoroughly with the seasoned vegetables. Continue cooking for 6-8 minutes, stirring frequently, until the beef is completely browned with no pink remaining.
Step 4: Add Tomatoes
Stir in the diced tomatoes and mix well with the beef mixture. Let this cook together for 2-3 minutes, allowing the flavors to meld and the tomatoes to warm through.
Step 5: Melt the Cheese
Add the cubed processed cheese to the pan. Reduce heat to medium-low. Stir occasionally and patiently allow the cheese to melt completely, about 5-7 minutes, until the mixture becomes smooth, creamy, and fully incorporated.
Step 6: Serve and Garnish
Pour the finished queso into a heat-safe serving bowl or cast iron skillet (which helps retain heat). Garnish generously with fresh jalapeño slices, Fresno chilis, chopped green onions, and cilantro sprigs. Serve immediately with blue tortilla chips, celery sticks, and carrot sticks on the side.
Notes
Store leftover chili con queso in an airtight container in the refrigerator for up to 4 days. Reheat gently on the stovetop over low heat, stirring frequently and adding 2-3 tablespoons of milk to restore creaminess. Microwave in 30-second intervals, stirring between each, until heated through and smooth.
Nutrition Information:
Yield:
8Serving Size:
1Amount Per Serving: Calories: 150
This copycat Chuy’s chili con queso recipe brings the beloved Tex-Mex restaurant classic right to your kitchen with minimal effort and maximum flavor. Whether you’re preparing this authentic chili con queso recipe for game day gatherings, family taco nights, or simply satisfying a cheese craving, it delivers every single time.
The combination of seasoned ground beef, melted cheese, and aromatic spices creates an irresistible dip that disappears fast. Try this recipe today and discover why it’s become a crowd favorite!
You can also follow us on Pinterest, and YouTube for more delicious updates and kitchen inspiration. Your feedback and support mean the world to us!