Want to enjoy homemade Yogurt bagels without dealing with yeast or waiting for the dough to rise? This easy yogurt bagel recipe is the perfect solution! Made with just a few simple ingredients like Greek yogurt and self-rising flour, these bagels turn out soft, chewy, and absolutely delicious.
Unlike traditional bagels that require boiling, this no-yeast bagel recipe saves time without compromising on texture. Plus, you can customize them with your favorite toppings, from everything bagel seasoning to cinnamon sugar. Whether you’re looking for a healthy breakfast or a quick snack, these homemade bagels are a must-try!
Why You’ll Love This Yogurt Bagel Recipe
No Yeast, No Boiling
Traditional bagels require yeast, proofing, and boiling, which can be time-consuming. This yogurt bagel recipe skips those steps, making it faster and easier. Instead of waiting for the dough to rise, you simply mix, shape, and bake—ready in under 30 minutes!
Greek yogurt and self-rising flour create a naturally soft and chewy texture without yeast. The baking powder in self-rising flour helps the bagels rise while baking, eliminating extra prep work. Since there’s no boiling, the process is hassle-free. Just brush the dough with an egg wash or milk, add toppings, and bake until golden.
This method is perfect for busy mornings or beginners who want fresh, homemade bagels without the wait. Whether you enjoy them plain or with cream cheese, these quick bagels deliver great taste with minimal effort!
Soft and Chewy Texture
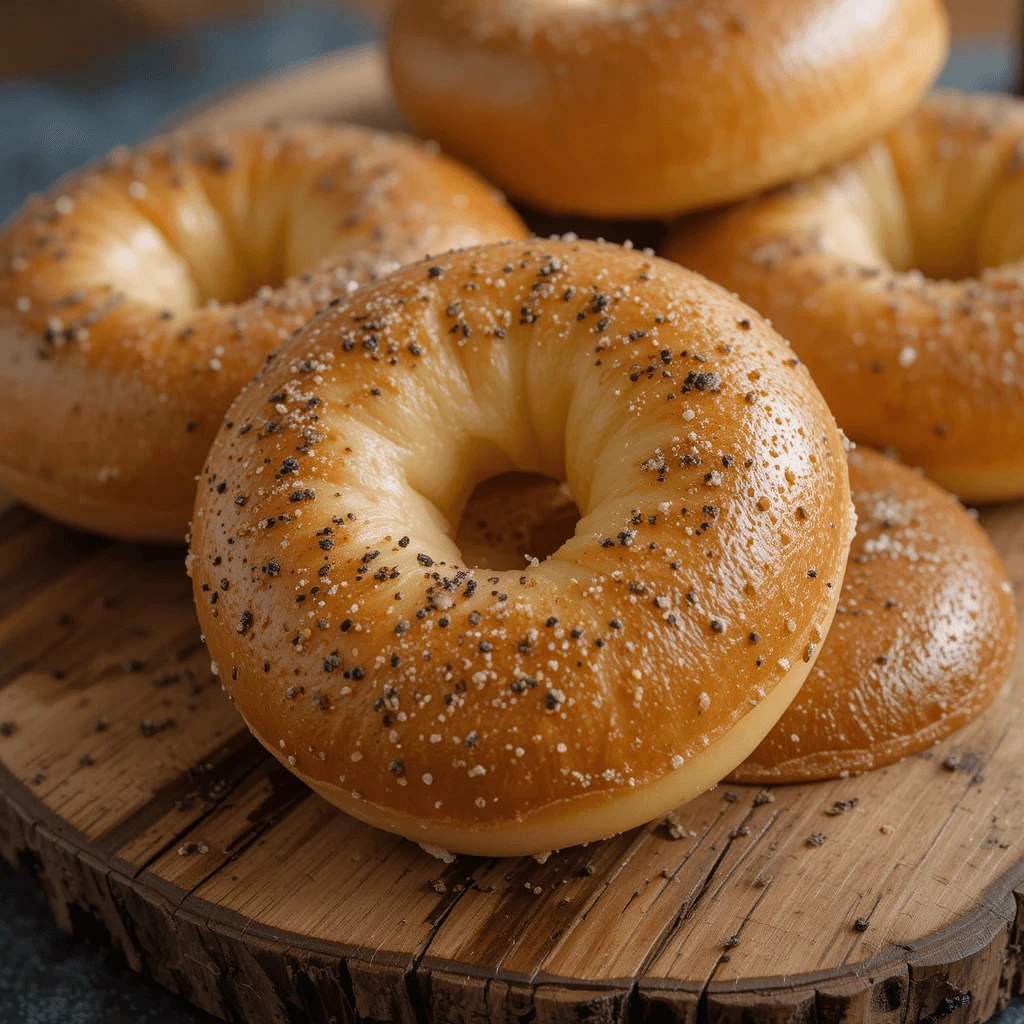
Despite skipping the yeast and boiling, these yogurt bagels have the same soft, chewy texture as traditional ones. The combination of Greek yogurt and self-rising flour gives them a moist, tender interior, while the baking powder helps them rise.
Greek yogurt adds a slight tang and moisture, keeping the bagels soft inside, while self-rising flour ensures they’re light yet dense. Kneading the dough gently ensures the perfect balance of softness and chewiness.
Baking at the right temperature creates a golden, crisp exterior while maintaining a soft interior. Brushing the bagels with egg wash or milk gives them a beautifully browned crust. These bagels deliver the same great texture as traditional bagels—easy and delicious!
Healthy and Customizable
One of the best things about this yogurt bagel recipe is how easily it can be customized to suit your dietary needs. If you’re looking for a healthier option, simply swap self-rising flour for whole wheat flour. This will add extra fiber and nutrients to your bagels, while still maintaining that soft, chewy texture.
You can also experiment with a variety of toppings to make your bagels uniquely yours. Whether you prefer classic everything bagel seasoning, sesame seeds, or something sweet like cinnamon sugar, the options are endless. For extra protein, try adding flaxseeds or chia seeds to the dough.
This recipe allows you to make the bagels as healthy or indulgent as you like, making them perfect for any diet or taste preference!
Ingredients You Need for Homemade Yogurt Bagels
Essential Ingredients
- Greek Yogurt: The foundation of this recipe, Yogurt Bagel dough uses Greek yogurt to provide moisture and richness. Its thick texture binds the ingredients together while adding a subtle tang that enhances the flavor. The yogurt also helps keep the Yogurt Bagels soft and tender without the need for yeast, resulting in a quicker, easier process.
- Self-Rising Flour: This is the key ingredient that eliminates the need for yeast. Self-rising flour combines flour, baking powder, and salt, which allows the dough to rise as it bakes. It gives the bagels a light, airy interior while maintaining a slightly dense texture, just like traditional bagels.
- Baking Powder: While self-rising flour already includes baking powder, adding a little extra ensures the dough rises perfectly. The baking powder acts as the leavening agent, helping the bagels achieve that desirable puffed-up look and soft, chewy interior, all without the long wait times required for yeast-based recipes.
Together, these ingredients create a simple yet effective dough that yields delicious bagels with minimal effort.
Best Toppings
One of the best things about making your own yogurt bagel is the ability to customize them with your favorite toppings. Here are some options to elevate the flavor:
- Everything Bagel Seasoning: A popular choice, this blend of sesame seeds, poppy seeds, garlic, onion, and salt gives your bagels that classic savory taste. It’s perfect for those who love a bit of crunch and a lot of flavor.
- Sesame Seeds: For a simpler option, sesame seeds add a delicate crunch and a mild nutty flavor. They’re a great choice for anyone who enjoys a lighter topping without overpowering the Yogurt Bagel’s natural taste.
- Cinnamon Sugar: If you’re in the mood for something sweeter, cinnamon sugar is an excellent choice. The warm cinnamon paired with the sweetness of sugar creates a comforting flavor perfect for breakfast or a snack.
Feel free to experiment with these toppings or even combine them for a more complex flavor!
Optional Add-Ins – Whole Wheat Flour, Honey, or Garlic Powder for Extra Flavor
For even more flavor and texture, consider adding some optional ingredients to customize your yogurt bagels:
- Whole Wheat Flour: Swap out some or all of the self-rising flour for whole wheat flour to add extra fiber and nutrients. This will give your bagels a heartier, more rustic flavor while still maintaining a soft texture.
- Honey: For a touch of sweetness, add a spoonful of honey to the dough. It pairs beautifully with cinnamon sugar or can be used on its own for a subtly sweet bagel. Honey also helps keep the bagels soft and moist.
- Garlic Powder: If you prefer a savory bagel, garlic powder is a great add-in. It infuses the dough with a rich, aromatic flavor that pairs perfectly with savory toppings like cream cheese or herb butter.
These optional ingredients allow you to get creative with your bagel flavors, making them unique and tailored to your taste!
How to Make Yogurt Bagels Step by Step
Step 1: Prepare the Dough
The first step in making these yogurt bagels is preparing the dough. Start by combining the key ingredients: Greek yogurt, self-rising flour, and baking powder. You can mix these ingredients in a large bowl using a spoon or spatula until they start to come together into a dough.
After the ingredients are mixed together, it’s time to begin kneading the dough. Sprinkle a little flour onto a clean surface and transfer the dough onto it. Gently knead the dough for about 3-5 minutes, folding it over and pressing it down repeatedly. This helps activate the gluten in the flour, giving the bagels their structure and chewiness. Be careful not to overwork the dough, as this can make the bagels too dense.
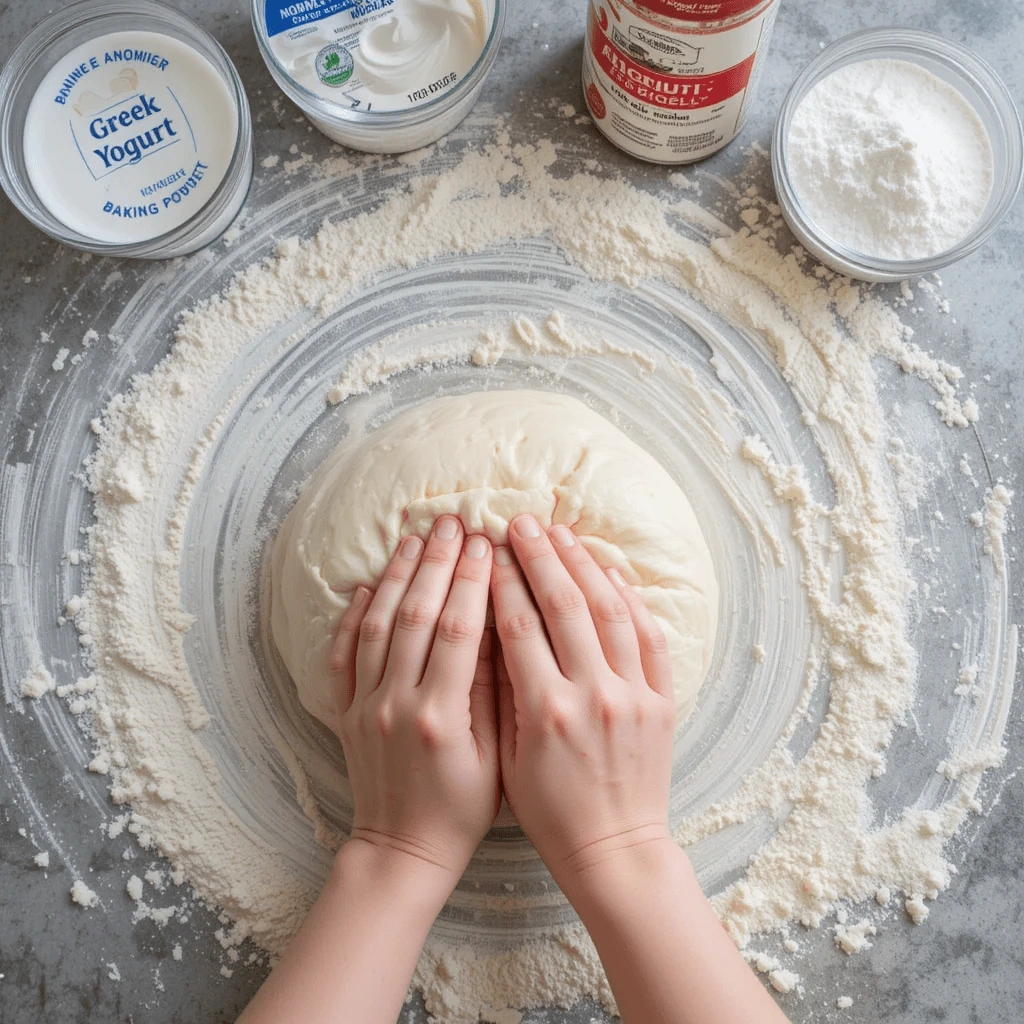
The dough should be smooth with a slightly sticky texture, but not too wet or overly sticky. If it feels too wet, add a little more flour, but do so sparingly to maintain the soft texture. Once the dough reaches the right consistency, you’re ready to shape your bagels and move on to the next step!
Step 2: Shape the Bagels
Once the dough is ready, divide it into equal portions to ensure uniform bagels. Depending on the batch size, you can typically make four to six bagels from this recipe. Roll each portion into a smooth ball, then use your fingers to create a hole in the center, gently stretching it into a classic bagel shape.
For a more even shape, you can roll the dough into ropes and connect the ends. Make sure the hole is large enough, as it will shrink slightly during baking. If the dough feels sticky, lightly dust your hands with flour to prevent sticking.
After shaping, place the bagels on a parchment-lined baking sheet. At this stage, you can brush them with an egg wash or milk for a golden crust. If adding toppings like sesame seeds or everything bagel seasoning, sprinkle them on before baking so they adhere well.
With the bagels shaped and prepped, they’re ready to go into the oven for baking!
Step 3: Serve and Enjoy
Once the bagels are golden brown and baked to perfection, let them cool slightly before serving. This allows the texture to set while keeping the inside soft and chewy.
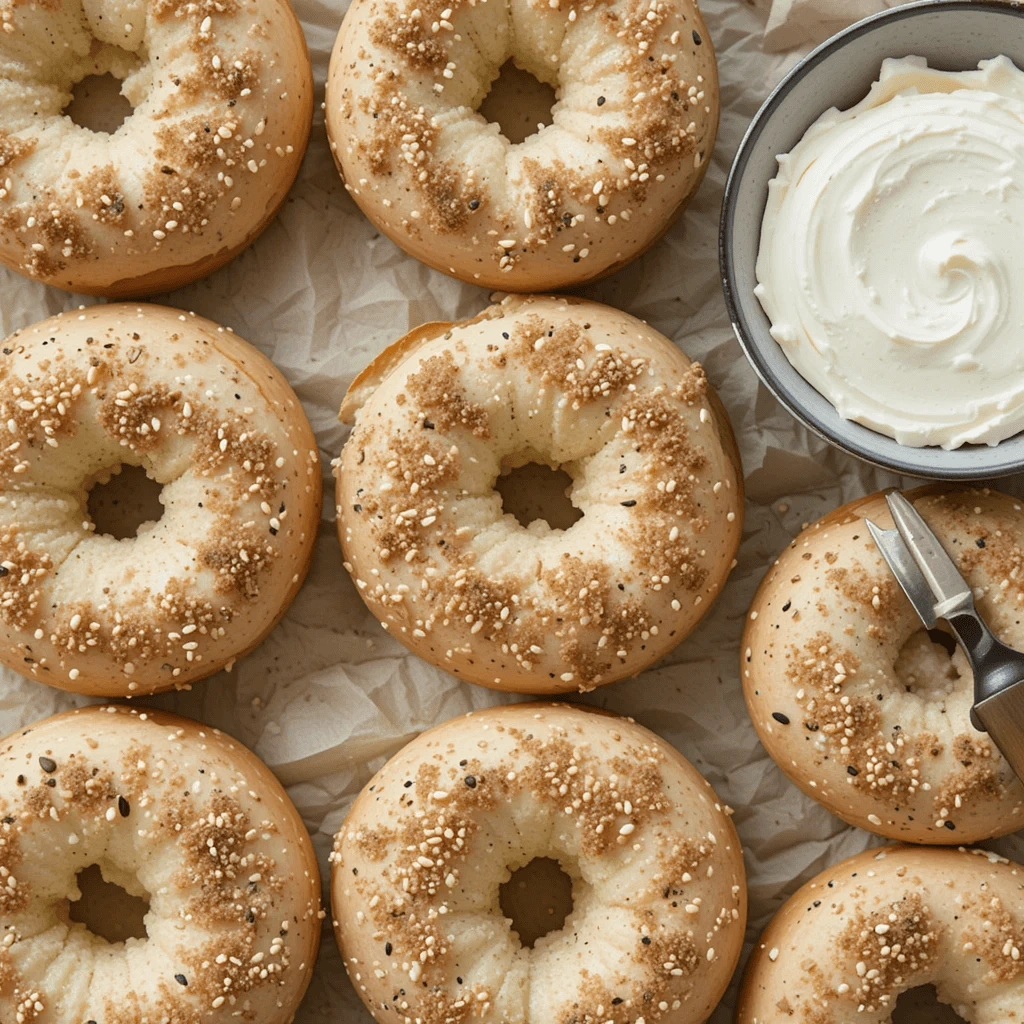
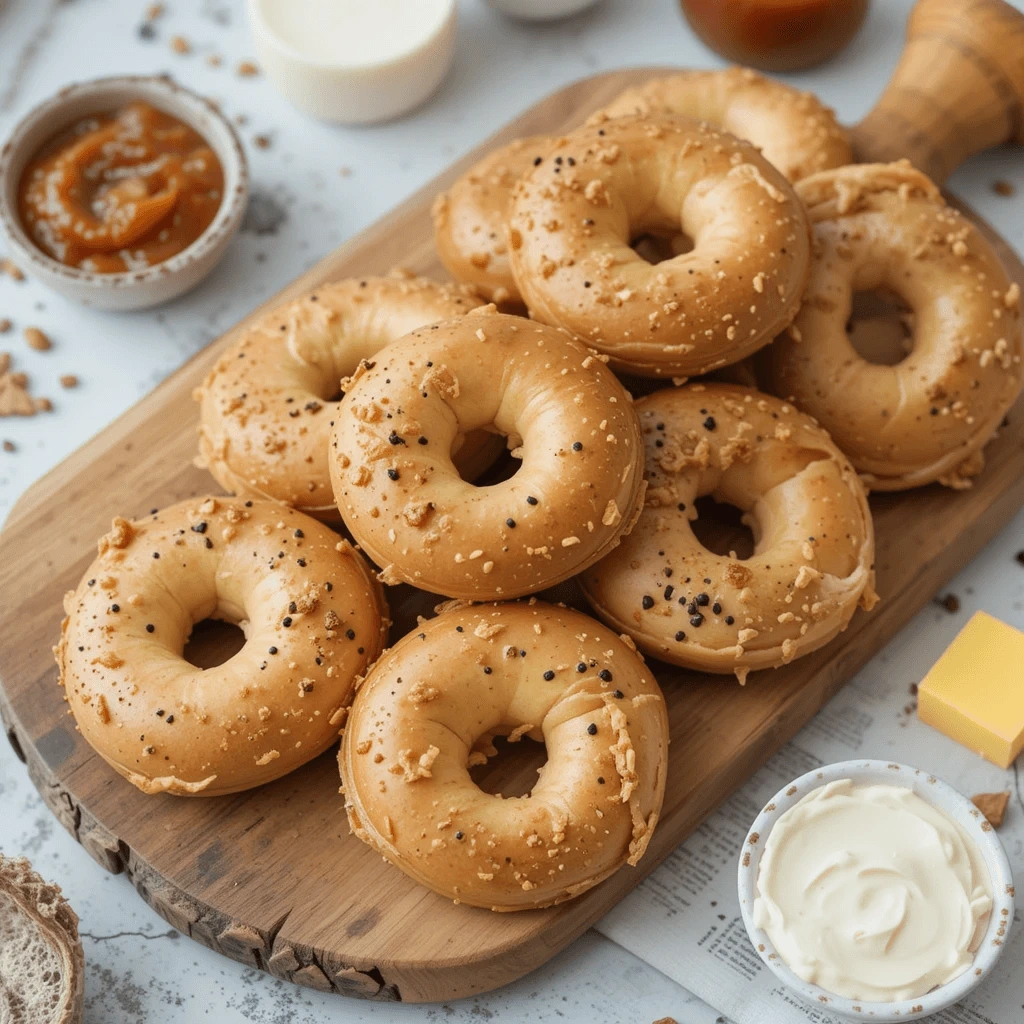
Enjoy these homemade yogurt bagels warm or toasted, paired with your favorite spreads. Cream cheese adds a rich and creamy touch, while butter melts into the warm bagel for a classic flavor. If you prefer something sweet, jam or honey makes a delicious topping.
For a heartier meal, turn your bagel into a sandwich with avocado, eggs, or smoked salmon. Whether enjoyed for breakfast, a snack, or lunch, these bagels are a quick and satisfying treat!
Tips and Variations for the Best Yogurt Bagels
How to Make Them Gluten-Free
- Use a Gluten-Free Flour Blend – Replace self-rising flour with a 1:1 gluten-free baking mix that contains xanthan gum or guar gum for better texture and elasticity.
- Adjust Moisture if Needed – Gluten-free flour absorbs moisture differently, so you may need to add a little extra Greek yogurt if the dough feels too dry or crumbly. Start with the original amount and gradually add more if necessary.
- Add Baking Powder and Salt – If your gluten-free blend doesn’t contain baking powder and salt, mix them in separately to help the bagels rise properly. Use about 1 ½ teaspoons of baking powder per cup of flour.
- Knead Gently – Gluten-free dough is more delicate, so knead it lightly until just combined. Overworking the dough can make the bagels too dense or crumbly.
- Bake as Usual – Shape the bagels, add your favorite toppings, and bake them at the same temperature as the regular version. They may have a slightly different texture but will still be soft, chewy, and delicious.
With these simple adjustments, you can enjoy homemade gluten-free yogurt bagels that taste just as good as the original!
High-Protein Option
- Increase Greek Yogurt – Add a little more Greek yogurt to the dough to boost the protein content while keeping the bagels soft and moist. Greek yogurt is naturally high in protein, making it a great addition.
- Choose High-Protein Flour – Swap some of the self-rising flour with almond flour or a high-protein baking mix to enhance the protein content while maintaining a good texture.
- Add Protein Powder – Mix in unflavored or vanilla protein powder to the dough for an extra protein boost. Start with 1-2 tablespoons and adjust as needed to avoid drying out the dough.
- Top with Seeds – Sprinkle chia seeds, flaxseeds, or hemp seeds on top before baking. These seeds not only add crunch but also provide extra protein and healthy fats.
With these modifications, you can make a high-protein version of your yogurt bagels that’s both nutritious and satisfying!
Storage and Reheating
- Storing Fresh Bagels – Once your yogurt bagels have cooled, store them in an airtight container at room temperature for up to 2-3 days. This will help maintain their softness and flavor. If you’re planning to keep them longer, place them in the freezer for up to 1-2 months.
- Reheating for Freshness – To get that fresh, warm texture back, toast the bagels or warm them in the oven at 350°F (175°C) for about 5-7 minutes. This helps bring back their chewy texture and golden crust.
- Freezing for Later – For easy grab-and-go meals, freeze individual bagels in resealable plastic bags or an airtight container. When ready to enjoy, simply pop them in the oven or toaster for a quick reheat.
Proper storage and reheating methods ensure your yogurt bagels stay fresh and delicious, so you can enjoy them whenever you want!
If you’re craving more easy and delicious recipes, check out our Easy Gipfeli Recipe, a buttery Swiss Croissants. These melt-in-your-mouth croissants are simple to make and perfect for breakfast or a sweet treat. Give them a try for another delightful homemade option!