
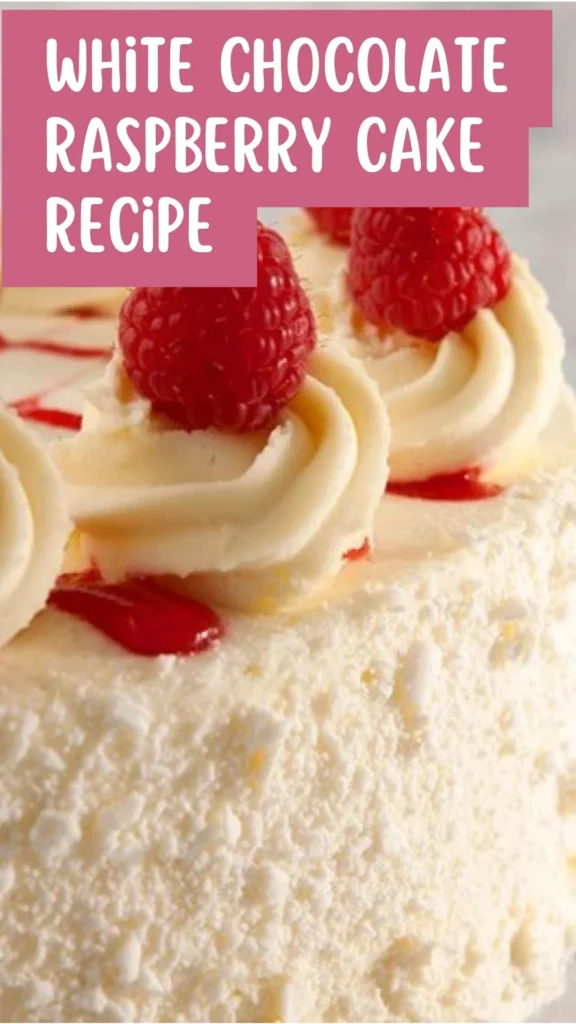
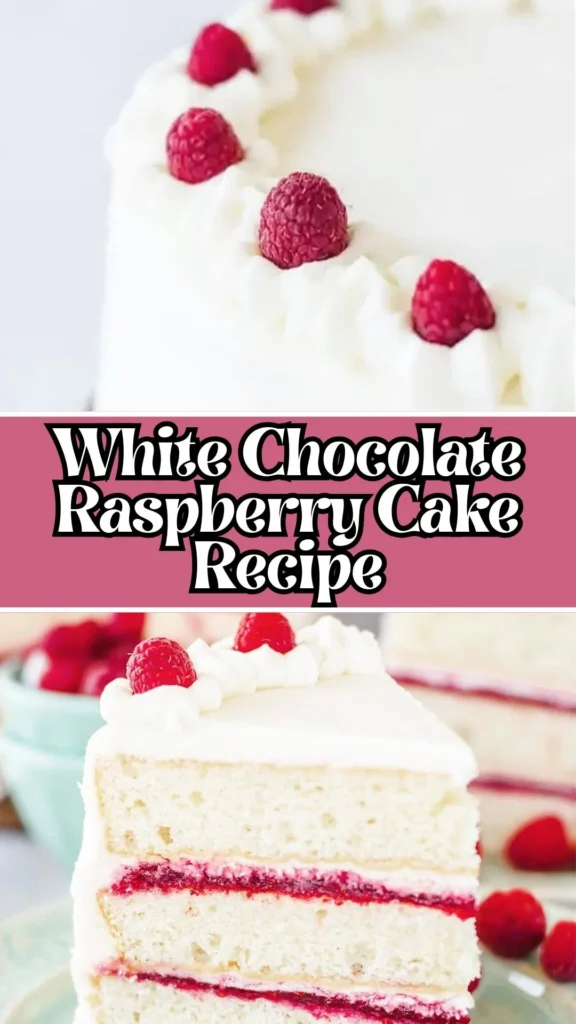
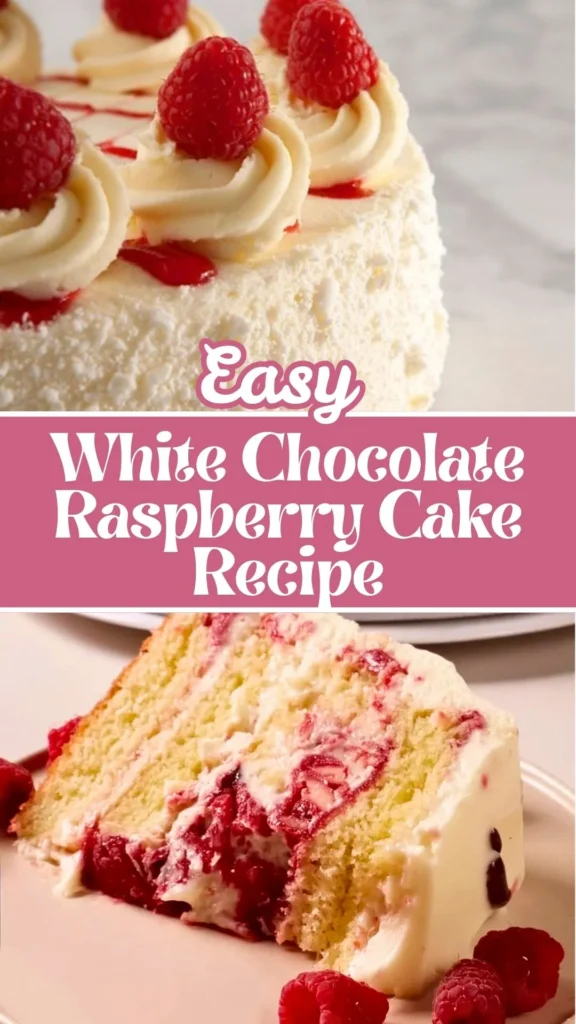
There’s something magical about the combination of white chocolate and raspberries – and this white chocolate raspberry cake brings that magic to life in the most spectacular way.
This raspberry white chocolate cake recipe features eight delicate raspberry-rippled sponge layers sandwiched with luscious white chocolate buttercream and vibrant raspberry goo.
Whether you’re celebrating a special occasion or simply treating yourself to something extraordinary, this recipe for white chocolate raspberry cake delivers both stunning visual appeal and unforgettable flavor.
Let me walk you through exactly how to make white chocolate raspberry cake that will have everyone asking for seconds!
What Does White Chocolate Raspberry Cake Taste Like?
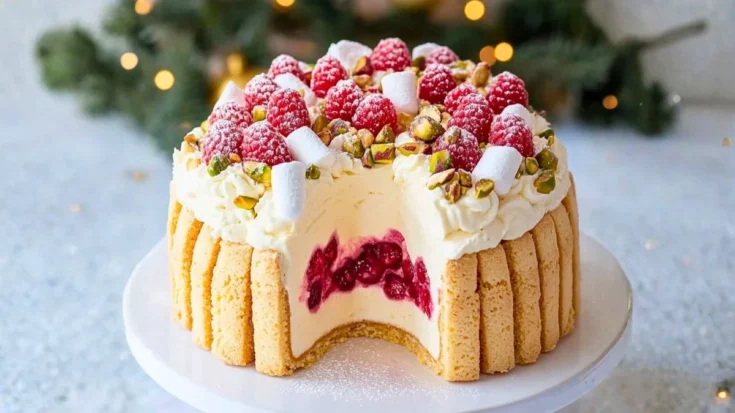
This white chocolate raspberry cake is a symphony of complementary flavors and textures. The tender, buttery sponge layers are studded with sweet-tart raspberry ripples that burst with fresh fruit flavor.
The white chocolate buttercream is silky, creamy, and luxuriously sweet with that distinctive caramelized milk note that only white chocolate can provide.
The homemade raspberry goo adds bright acidity that cuts through the richness beautifully. Each bite delivers the perfect balance – sweet white chocolate elegance meets tangy raspberry brightness, all wrapped in a cloud-soft cake that melts on your tongue.
White Chocolate Raspberry Cake Recipe Ingredients You’ll Need
For the Raspberry Ripple Sponge (Makes 8 Layers)
- 625 g unsalted butter, softened
- 625 g caster sugar
- 10 large eggs
- 625 g self-raising flour, sifted
- 4 tbsp whole milk
- Large quantity of raspberry goo (for rippling)
The Raspberry Goo (Homemade Raspberry Sauce)
- 400-600 g fresh or frozen raspberries
- 2-3 tbsp sugar (to taste)
And the White Chocolate Buttercream
- 500 g unsalted butter, softened
- 750 g icing sugar (powdered sugar)
- 320 g white chocolate, melted and cooled
- Whole milk (as needed for consistency)
Raspberry-Pink Buttercream Band
- Small portion of white chocolate buttercream
- 1-2 tbsp raspberry goo
Decorations
- Meringue kisses
- 100 g white chocolate, melted (for dipping)
- Freeze-dried raspberries
- White chocolate balls or molds
- Edible gold leaf
- Extra melted white chocolate (for drip)
- Reserved raspberry goo
Kitchen Utensils and Equipment
- Stand mixer with paddle attachment
- 4 × 9-inch round cake tins
- Cake release spray
- Medium saucepan
- Fine-mesh strainer
- Mixing bowls (various sizes)
- Offset palette knife
- Cake leveler or long serrated knife
- Cake turntable
- Bench scraper
- 8-inch cake board
- Piping bags or squeeze bottle
- Small offset spatula
- Clean paintbrush (for gold leaf)
- Wire cooling racks
- Skewer or toothpick (for testing doneness)
Preparation and Cooking Time
- Prep Time: 1 hour 30 minutes
- Baking Time: 20-25 minutes
- Cooling & Assembly Time: 2 hours
- Total Time: Approximately 4 hours
- Servings: 16-20 generous slices
White Chocolate Raspberry Cake Recipe Instructions
Step 1: Make the Raspberry Goo
Place 400-600 g raspberries in a medium saucepan with 2-3 tbsp sugar. Cook over high heat until bubbling vigorously. Reduce heat to low and simmer for 10-15 minutes, stirring occasionally, until thickened and reduced. Strain through a fine-mesh sieve to remove seeds, pressing down to extract maximum puree. Let cool completely before using. Make extra – you’ll need plenty for rippling the batter, filling layers, and decorating.

Step 2: Prepare the Raspberry Ripple Sponge
Preheat your oven to 170°C (340°F) fan-assisted. In a stand mixer fitted with the paddle attachment, cream 625 g softened butter and 625 g caster sugar on medium-high speed for approximately 5 minutes. The mixture should become very pale, fluffy, and almost white in color – this means the sugar has mostly dissolved and you’ve incorporated plenty of air for a light crumb.
Step 3: Add the Eggs
Add the 10 eggs gradually, about 2 at a time, beating well after each addition. This keeps the mixture airy and emulsified. Don’t worry if it looks split or scrambled – it will come back together when you add the flour.
Step 4: Incorporate Flour and Milk
With the mixer on very low speed, add half of the 625 g sifted self-raising flour, folding it in gently to avoid knocking out the air you’ve worked so hard to incorporate. Add 4 tbsp whole milk while the mixer runs slowly. Add the remaining flour and mix on low speed until just combined. Finish folding by hand with a spatula to ensure everything is fully incorporated. The batter should be silky and smooth.
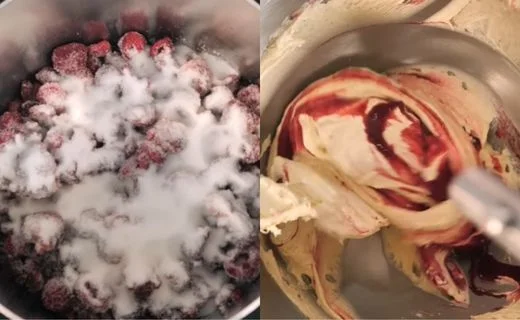
Step 5: Create the Raspberry Ripple Effect
Spray 4 × 9-inch cake tins generously with cake release spray. Add 2-3 tbsp raspberry goo to the batter in the bowl and swirl lightly with your spatula – don’t overmix; you want to keep distinct ripples and pools of raspberry throughout. Divide the batter evenly among the 4 prepared tins. Add more raspberry goo in spots on top of each cake and swirl gently with a skewer or knife. Smooth the tops.
Step 6: Bake the Cakes
Bake for 20-25 minutes. Check at the 20-minute mark by inserting a skewer into the center – it should come out clean. If it’s gooey with raw batter, give it another 1-2 minutes. Don’t overbake or the cakes will be dry. Remove from the oven and let cool in the tins for 10 minutes, then turn out onto wire racks to cool completely.
Step 7: Make the White Chocolate Buttercream
Melt 320 g white chocolate using a double boiler or microwave (in 30-second bursts, stirring between each). Let it cool to room temperature. In your stand mixer with the paddle attachment, whip 500 g softened butter on high speed until it’s pale, fluffy, and white – about 3-4 minutes.
Step 8: Complete the Buttercream
Gradually add 750 g icing sugar in batches, starting on low speed to avoid a sugar cloud, then increasing to high speed until fully combined. Set aside a small amount of plain buttercream for later. Add the cooled melted white chocolate and whip until incorporated. Add whole milk gradually, one tablespoon at a time, until you achieve a smooth, spreadable consistency that holds its shape – not too firm or too sloppy.
Step 9: Make the Pink Raspberry Buttercream
Take the small amount of plain buttercream you set aside and mix in a spoonful or two of raspberry goo until you achieve a pretty pink color. This will be used for the decorative bottom band.
Step 10: Level and Split the Cakes
Once the cakes are completely cool, trim the domed tops with a serrated knife to create flat surfaces. Using a cake leveler or long serrated knife, carefully split each 9-inch cake in half horizontally to create 8 thin layers total. If desired, trim the edges to make 8-inch cakes, removing the caramelized sides for a cleaner look.
Step 11: Fill and Stack the Layers
Place your first cake layer on an 8-inch cake board set on a turntable. Spread a thin layer of raspberry goo over the surface, then add a thin layer of white chocolate buttercream. Since you have 8 layers, use less buttercream per layer to avoid an unstable cake. Place the second layer on top, checking alignment to keep your stack straight. Repeat this alternating filling pattern – raspberry goo, then buttercream – until all 8 layers are stacked.
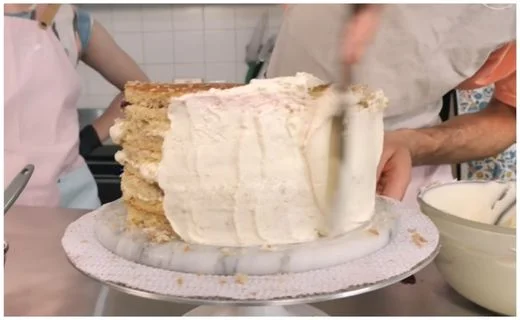
Step 12: Apply the Crumb Coat
Apply a thin layer of white chocolate buttercream over the sides and top of the stacked cake to seal in crumbs. Use your offset palette knife and bench scraper to smooth the sides (spinning the turntable as you work), and smooth the top at a 45-degree angle. Chill in the refrigerator for at least 30 minutes, up to 2 hours, to firm up the buttercream.
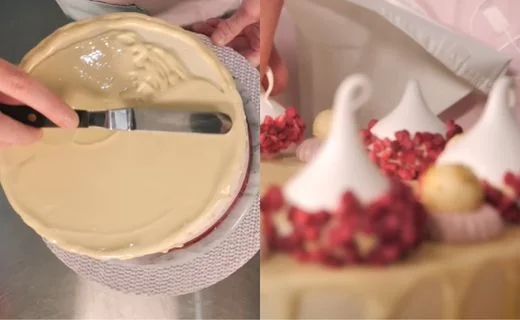
Step 13: Prepare Decorated Meringues
While the cake chills, dip meringue kisses into melted white chocolate, then immediately into freeze-dried raspberries. Set aside on parchment paper to harden.
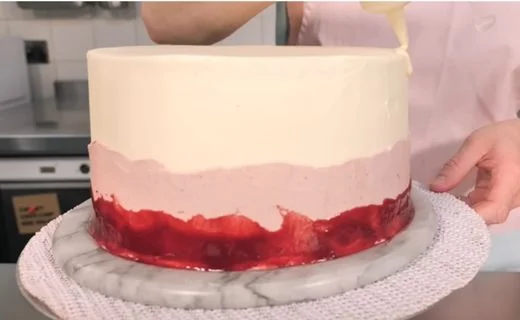
Step 14: Create Decorative Bands
Once the cake is chilled and firm, apply the raspberry-pink buttercream in a wiggly band around the lower half of the cake – it doesn’t need to be perfectly straight. Apply a second thin band of raspberry goo higher up on the cake using a piping bag or spoon.
Step 15: Add the White Chocolate Drip
Pour or drip melted white chocolate around the top edge of the cake, allowing it to drip down the sides naturally. Carefully spread melted white chocolate across the center of the top. You can add a parchment barrier to protect your drips if needed. Chill briefly to set the drip.
Step 16: Final Decorations
Add a blob of raspberry buttercream on top and arrange your white chocolate balls (decorated with gold leaf applied using a clean brush), the freeze-dried raspberry meringues (stick them on with a dab of buttercream), and add extra touches of edible gold leaf around the buttercream edges for elegance. Chill briefly to set all decorations in place.
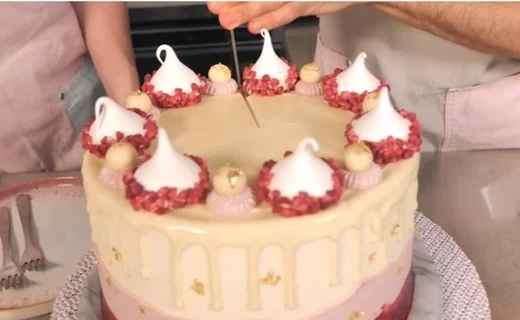
Step 17: Serve and Enjoy
Slice into your masterpiece to reveal the beautiful layers of raspberry-rippled sponge and creamy white chocolate filling. Serve at room temperature for the best flavor and texture!
Customization and Pairing Ideas for Serving
1. Strawberry White Chocolate Variation
Swap the raspberries for fresh strawberries to create a strawberry white chocolate cake. Make strawberry puree the same way, reducing it until thick and jammy. This variation offers a sweeter, less tart profile that kids especially love.
2. Dark Chocolate Drip Alternative
For those who find white chocolate too sweet, replace the white chocolate drip with dark or milk chocolate ganache. The bittersweet notes of dark chocolate create an elegant contrast with the sweet buttercream and tart raspberries.
3. Lemon Raspberry Twist
Add the zest of 2-3 lemons to your cake batter and 1 tsp of lemon extract to your buttercream. This lemon raspberry white chocolate cake combination adds bright citrus notes that elevate the entire flavor profile and cut through the richness beautifully.
4. Mixed Berry Version
Combine raspberries with blackberries and blueberries for a mixed berry white chocolate cake. This creates a more complex fruit flavor and adds visual interest with different colored berry pieces throughout.
5. Champagne Pairing
Serve slices with a glass of chilled champagne or prosecco. The bubbles and acidity of sparkling wine perfectly complement the sweet white chocolate and cut through the buttercream richness, making this an ideal wedding or celebration cake pairing.
6. Coffee or Tea Service
This cake pairs beautifully with espresso, cappuccino, or Earl Grey tea. The tannins in tea and the bitterness of coffee balance the sweetness, while the white chocolate’s creamy notes harmonize with milk-based coffee drinks.
7. Ice Cream Accompaniment
Serve warm slices with vanilla bean ice cream or raspberry sorbet on the side. The temperature contrast and the cold creaminess of ice cream against the soft cake creates a restaurant-quality dessert experience that guests will remember.
Essential Tips for Perfect White Chocolate Raspberry Cake
Tip 1: Room Temperature Ingredients Are Critical
Ensure your butter and eggs are genuinely at room temperature (around 65-70°F) before you begin. Cold ingredients won’t emulsify properly, leading to a dense cake and split buttercream. Take butter and eggs out of the fridge 2-3 hours before baking. This simple step makes an enormous difference in achieving that light, fluffy crumb.
Tip 2: Don’t Skimp on Creaming Time
When creaming butter and sugar, that full 5 minutes at medium-high speed isn’t optional – it’s essential. This process incorporates air bubbles that act as leavening agents, creating the cake’s tender structure. The mixture should look almost white and be noticeably increased in volume. Under-creaming results in a dense, heavy cake.
Tip 3: Quality White Chocolate Matters
Not all white chocolate is created equal. Choose a high-quality white chocolate with at least 20% cocoa butter (check the label). Avoid “white baking chips” or “white coating” products, which contain vegetable oils instead of cocoa butter and will make your buttercream grainy and separate. Brands like Valrhona, Callebaut, or Ghirardelli work beautifully.
Tip 4: Cool Melted Chocolate Completely
Before adding melted white chocolate to your buttercream, it must cool to room temperature. If it’s even slightly warm, it will melt your butter and turn your beautiful fluffy buttercream into a soupy mess. Touch the bowl – it should feel cool to the touch, not warm.
Tip 5: Layer Stability is Everything
With 8 layers, structural integrity becomes crucial. Use less filling per layer than you think you need – a thin, even spread is better than generous globs that will squeeze out and make the cake lean. If your cake starts to lean while stacking, chill it for 15-20 minutes to firm up before continuing.
Tip 6: Invest in a Cake Leveler
While you can level cakes with a serrated knife, a wire cake leveler (under $15) makes splitting cakes into even horizontal layers infinitely easier and more precise. This tool ensures each layer is the same thickness, which means even baking and a more stable final cake.
Tip 7: Make Components Ahead
This is a time-intensive cake, so break it into stages. Bake the cakes one day, wrap tightly in plastic wrap, and refrigerate. Make the raspberry goo up to a week ahead and refrigerate. Make the buttercream the day before and store at room temperature (or refrigerate and re-whip before using). Assemble and decorate on serving day. This approach reduces stress and actually improves flavor as the cakes have time to settle.
Storage and Reheating Guidance
Store your white chocolate raspberry cake covered at room temperature for up to 2 days, or refrigerated for up to 5 days. Bring to room temperature 1-2 hours before serving for best flavor and texture. The buttercream may firm up in the fridge, so this resting time is essential for creamy slices.
Common Queries and FAQs
Common White Chocolate Raspberry Cake Recipe questions answered to help you understand it better.
Can I make this white chocolate raspberry cake ahead of time?
Yes! You can bake the cake layers up to 2 days in advance. Wrap each cooled layer tightly in plastic wrap and store at room temperature, or refrigerate for up to 4 days. The raspberry goo can be made up to a week ahead and refrigerated. The buttercream can be made 2-3 days ahead and stored at room temperature in an airtight container. Assemble the cake the day before your event and refrigerate, then bring to room temperature before serving.
Why did my white chocolate buttercream turn out grainy?
Grainy buttercream typically results from using low-quality white chocolate that contains vegetable oils instead of cocoa butter, or from adding chocolate that’s too warm to the butter. Always use real white chocolate with cocoa butter listed in the ingredients, and ensure it’s completely cooled before adding to your whipped butter. If it’s already grainy, try warming it very gently and re-whipping.
Can I use a different size cake tin?
Yes, but you’ll need to adjust baking times. If using 8-inch tins, the batter will be deeper and require 25-30 minutes of baking. For 10-inch tins, the layers will be thinner and may only need 15-18 minutes. Always check with a skewer for doneness rather than relying solely on time.
How do I prevent my cake layers from doming?
Doming occurs when the edges of the cake set before the center, forcing the middle to rise higher. Using baking strips (fabric strips soaked in water and wrapped around your tins) helps insulate the edges so the entire cake bakes more evenly. Alternatively, bake at a slightly lower temperature (160°C) for a few minutes longer.
Can I use frozen raspberries for the raspberry goo?
Absolutely! Frozen raspberries actually work wonderfully for the goo because they’re picked at peak ripeness and break down easily when cooked. No need to thaw them first – just add them frozen to your saucepan with sugar and proceed with the recipe. You may need an extra 2-3 minutes of cooking time.
My cake is leaning to one side. How do I fix it?
A leaning cake usually means the layers weren’t placed centrally on top of each other, or one side has more filling than the other. If you notice leaning while assembling, refrigerate the cake for 20 minutes to firm up, then gently press the top to nudge it back into alignment. For future cakes, use a turntable and check alignment from eye level after placing each layer.
What’s the best way to get clean cake slices?
Use a long, sharp knife dipped in hot water and wiped dry between each cut. The heat melts through the buttercream cleanly. Make one decisive cut rather than sawing back and forth, which can drag the layers and create messy slices. Wipe the knife clean after each slice for the prettiest presentation.
Can I make this cake without a stand mixer?
While a stand mixer makes the job much easier, you can use a hand mixer. The key is patience – you’ll need to cream the butter and sugar for the full 5 minutes and whip the buttercream thoroughly. Your arm might get tired, but the results will be just as delicious. For mixing the batter, finish folding by hand to avoid overworking.
How do I know when the white chocolate has cooled enough for the buttercream?
Touch the bottom of the bowl containing the melted chocolate. It should feel cool or just barely warm – definitely not hot. If you’re unsure, err on the side of caution and let it sit longer. Chocolate that’s too warm will melt your butter and ruin the buttercream texture.
Can I freeze this white chocolate raspberry cake?
Yes! You can freeze unfrosted cake layers wrapped tightly in plastic wrap and foil for up to 3 months. Thaw overnight in the refrigerator before assembling. You can also freeze assembled, frosted cake (without decorations) for up to 1 month. Thaw in the refrigerator overnight, then add decorations before serving. The buttercream may weep slightly when thawing, so gently smooth with a palette knife.
What can I substitute for self-raising flour?
If you don’t have self-raising flour, make your own by combining 625 g plain (all-purpose) flour with 4½ tsp baking powder and ¾ tsp salt. Sift these together three times to ensure the leavening is evenly distributed throughout the flour.
Why is my raspberry goo too runny?
Runny raspberry goo needs more cooking time. Return it to the saucepan and simmer longer, stirring frequently, until it reduces and thickens to a jam-like consistency that holds its shape on a spoon. Remember it will thicken further as it cools. If you’re in a rush, you can add ½ tsp of cornstarch mixed with 1 tbsp water to help thicken it faster.
This white chocolate raspberry cake recipe is truly a showstopper that combines elegant flavors with stunning visual appeal. While it requires time and attention to detail, the result is a bakery-quality raspberry white chocolate cake that will impress at any celebration.
White Chocolate Raspberry Cake Recipe
There’s something magical about the combination of white chocolate and raspberries – and this white chocolate raspberry cake brings that magic to life in the most spectacular way. This raspberry white chocolate cake recipe features eight delicate raspberry-rippled sponge layers sandwiched with luscious white chocolate buttercream and vibrant raspberry goo.
Ingredients
- 625 g unsalted butter, softened
- 625 g caster sugar
- 10 large eggs
- 625 g self-raising flour, sifted
- 4 tbsp whole milk
- Large quantity of raspberry goo (for rippling)
- 400-600 g fresh or frozen raspberries
- 2-3 tbsp sugar (to taste)
- 500 g unsalted butter, softened
- 750 g icing sugar (powdered sugar)
- 320 g white chocolate, melted and cooled
- Whole milk (as needed for consistency)
- Small portion of white chocolate buttercream
- 1-2 tbsp raspberry goo
- Meringue kisses
- 100 g white chocolate, melted (for dipping)
- Freeze-dried raspberries
- White chocolate balls or molds
- Edible gold leaf
- Extra melted white chocolate (for drip)
- Reserved raspberry goo
Instructions
Step 1: Make the Raspberry Goo
Place 400-600 g raspberries in a medium saucepan with 2-3 tbsp sugar. Cook over high heat until bubbling vigorously. Reduce heat to low and simmer for 10-15 minutes, stirring occasionally, until thickened and reduced. Strain through a fine-mesh sieve to remove seeds, pressing down to extract maximum puree. Let cool completely before using. Make extra – you’ll need plenty for rippling the batter, filling layers, and decorating.
Step 2: Prepare the Raspberry Ripple Sponge
Preheat your oven to 170°C (340°F) fan-assisted. In a stand mixer fitted with the paddle attachment, cream 625 g softened butter and 625 g caster sugar on medium-high speed for approximately 5 minutes. The mixture should become very pale, fluffy, and almost white in color – this means the sugar has mostly dissolved and you’ve incorporated plenty of air for a light crumb.
Step 3: Add the Eggs
Add the 10 eggs gradually, about 2 at a time, beating well after each addition. This keeps the mixture airy and emulsified. Don’t worry if it looks split or scrambled – it will come back together when you add the flour.
Step 4: Incorporate Flour and Milk
With the mixer on very low speed, add half of the 625 g sifted self-raising flour, folding it in gently to avoid knocking out the air you’ve worked so hard to incorporate. Add 4 tbsp whole milk while the mixer runs slowly. Add the remaining flour and mix on low speed until just combined. Finish folding by hand with a spatula to ensure everything is fully incorporated. The batter should be silky and smooth.
Step 5: Create the Raspberry Ripple Effect
Spray 4 × 9-inch cake tins generously with cake release spray. Add 2-3 tbsp raspberry goo to the batter in the bowl and swirl lightly with your spatula – don’t overmix; you want to keep distinct ripples and pools of raspberry throughout. Divide the batter evenly among the 4 prepared tins. Add more raspberry goo in spots on top of each cake and swirl gently with a skewer or knife. Smooth the tops.
Step 6: Bake the Cakes
Bake for 20-25 minutes. Check at the 20-minute mark by inserting a skewer into the center – it should come out clean. If it’s gooey with raw batter, give it another 1-2 minutes. Don’t overbake or the cakes will be dry. Remove from the oven and let cool in the tins for 10 minutes, then turn out onto wire racks to cool completely.
Step 7: Make the White Chocolate Buttercream
Melt 320 g white chocolate using a double boiler or microwave (in 30-second bursts, stirring between each). Let it cool to room temperature. In your stand mixer with the paddle attachment, whip 500 g softened butter on high speed until it’s pale, fluffy, and white – about 3-4 minutes.
Step 8: Complete the Buttercream
Gradually add 750 g icing sugar in batches, starting on low speed to avoid a sugar cloud, then increasing to high speed until fully combined. Set aside a small amount of plain buttercream for later. Add the cooled melted white chocolate and whip until incorporated. Add whole milk gradually, one tablespoon at a time, until you achieve a smooth, spreadable consistency that holds its shape – not too firm or too sloppy
Step 9: Make the Pink Raspberry Buttercream
Take the small amount of plain buttercream you set aside and mix in a spoonful or two of raspberry goo until you achieve a pretty pink color. This will be used for the decorative bottom band.
Step 10: Level and Split the Cakes
Once the cakes are completely cool, trim the domed tops with a serrated knife to create flat surfaces. Using a cake leveler or long serrated knife, carefully split each 9-inch cake in half horizontally to create 8 thin layers total. If desired, trim the edges to make 8-inch cakes, removing the caramelized sides for a cleaner look.
Step 11: Fill and Stack the Layers
Place your first cake layer on an 8-inch cake board set on a turntable. Spread a thin layer of raspberry goo over the surface, then add a thin layer of white chocolate buttercream. Since you have 8 layers, use less buttercream per layer to avoid an unstable cake. Place the second layer on top, checking alignment to keep your stack straight. Repeat this alternating filling pattern – raspberry goo, then buttercream – until all 8 layers are stacked.
Step 12: Apply the Crumb Coat
Apply a thin layer of white chocolate buttercream over the sides and top of the stacked cake to seal in crumbs. Use your offset palette knife and bench scraper to smooth the sides (spinning the turntable as you work), and smooth the top at a 45-degree angle. Chill in the refrigerator for at least 30 minutes, up to 2 hours, to firm up the buttercream.
Step 13: Prepare Decorated Meringues
While the cake chills, dip meringue kisses into melted white chocolate, then immediately into freeze-dried raspberries. Set aside on parchment paper to harden.
Step 14: Create Decorative Bands
Once the cake is chilled and firm, apply the raspberry-pink buttercream in a wiggly band around the lower half of the cake – it doesn’t need to be perfectly straight. Apply a second thin band of raspberry goo higher up on the cake using a piping bag or spoon.
Step 15: Add the White Chocolate Drip
Pour or drip melted white chocolate around the top edge of the cake, allowing it to drip down the sides naturally. Carefully spread melted white chocolate across the center of the top. You can add a parchment barrier to protect your drips if needed. Chill briefly to set the drip.
Step 16: Final Decorations
Add a blob of raspberry buttercream on top and arrange your white chocolate balls (decorated with gold leaf applied using a clean brush), the freeze-dried raspberry meringues (stick them on with a dab of buttercream), and add extra touches of edible gold leaf around the buttercream edges for elegance. Chill briefly to set all decorations in place.
Step 17: Serve and Enjoy
Slice into your masterpiece to reveal the beautiful layers of raspberry-rippled sponge and creamy white chocolate filling. Serve at room temperature for the best flavor and texture!
Notes
Store your white chocolate raspberry cake covered at room temperature for up to 2 days, or refrigerated for up to 5 days. Bring to room temperature 1-2 hours before serving for best flavor and texture. The buttercream may firm up in the fridge, so this resting time is essential for creamy slices.
Nutrition Information:
Yield:
8Serving Size:
1Amount Per Serving: Calories: 110
The combination of tender raspberry-rippled layers, silky white chocolate buttercream, and bright raspberry goo creates a dessert that’s as delicious as it is beautiful. Now that you know how to make white chocolate raspberry cake, gather your ingredients and create this masterpiece – your family and friends will be talking about it for years to come!
You can also follow us on Pinterest, and YouTube for more delicious updates and kitchen inspiration. Your feedback and support mean the world to us!